
If you own a shed, you know the struggle. You wrestle with the lawnmower, scrape your knuckles on the wheelbarrow handles, and play a game of Tetris every time you try to retrieve your leaf blower. The culprit is almost always the door. Most stock sheds come with a single, 30-inch wide door. That might be fine for a rake, but it is a nightmare for anything with an engine or handles.
The solution? Double doors.
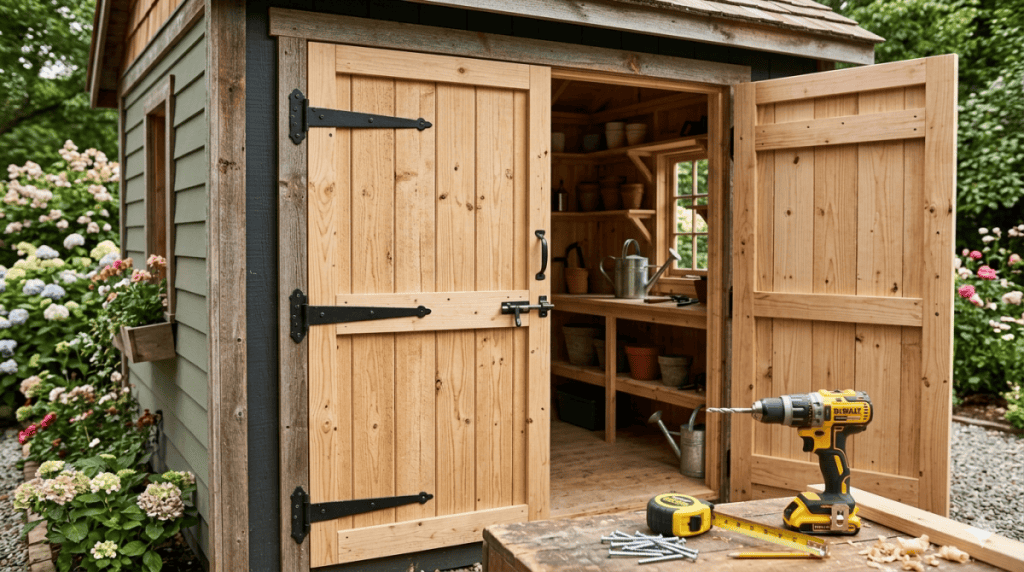
Installing a pair of swinging double doors transforms your shed from a cramped closet into a functional workshop. You gain the ability to walk in with your arms full, drive a riding mower inside, or let fresh air and light flood the interior. The best part? You don’t need to be a master carpenter. With basic tools, a weekend of time, and this guide, you can build sturdy, beautiful double doors from scratch.

In this guide, I will cover everything from material selection to hanging the doors perfectly. Let’s open up some possibilities.
I’ve broken this guide down into 8 parts. Enjoy.
Quick Navigation Menu
Why Double Doors? The Case for a Wider Entrance
Part 1: Planning and Measuring (The Golden Rule)
Part 2: Building the Door Frames (Rails and Stiles)
Part 3: Creating the Door Panels (The T&G Fill)
Part 4: The Diagonal Brace (Anti-Sag Insurance)
Part 5: Installing the Jamb (The Doorway Frame)
Part 6: Hanging the Doors (The Moment of Truth)
Part 7: Locking, Stopping, and Weatherproofing
Part 8: Finishing for Longevity
Why Double Doors? The Case for a Wider Entrance
Before we cut a single board, let’s look at why this upgrade is worth the sweat.
- Accessibility: Move large equipment (tillers, snowblowers, ATVs) in and out without dismantling them.
- Ventilation: Opening both doors creates a massive airflow, which is crucial if you store paint, solvents, or gasoline.
- Light: Double doors can be fitted with glass panels, turning a dark dungeon into a bright workspace.
- Aesthetics: A well-proportioned double door looks far more inviting and “barn-like” than a single man-door.
The standard size for a shed double door is typically 60 inches wide by 80 inches tall (two 30” x 80” doors) or 72 inches wide by 80 inches tall (two 36” x 80” doors). We will base this tutorial on a 60” x 80” opening, which fits most medium-sized sheds.
Part 1: Planning and Measuring (The Golden Rule)
“Measure twice, cut once” is not just a cute saying; it is the law of the workshop.

Step 1: Check Your Rough Opening
You need a framed opening in your shed wall. If you are retrofitting an existing shed with a single door, you will need to remove the old jambs and cut the siding to widen the hole. Ensure you have a header (a horizontal beam) across the top to support the roof weight. For a 60” double door, the rough opening should be 61” wide x 81” tall. Those extra inches account for the door jamb and shims.
Step 2: Gather Your Materials
For two 30” x 80” T&G (tongue and groove) double doors, you will need:
Lumber:
- 2x4s (for the frame/rails)
- 1×6 T&G boards (for the door skin – cedar or pine)
- 1×4 or 1×6 for diagonal bracing
- 1×4 casing for the exterior trim
- Door stop molding (1×2 strips)
Hardware:
- 4 heavy-duty strap hinges (or 4 ball bearing butt hinges – 4” size)
- 1 set of double door lock (surface mount flush bolt for the inactive door + handle for active door)
- Barrel bolt (top and bottom for the inactive door)
- 3” exterior wood screws
- Wood glue
- Exterior primer and paint or stain
Tools:
- Circular saw or table saw
- Drill / Driver
- Level (4-foot)
- Clamps (at least 4)
- Shims
- Speed square
Part 2: Building the Door Frames (Rails and Stiles)
A flat slab of wood will warp. A frame-and-panel construction will not. We are building a “frame and panel” door, where the outer frame (rails & stiles) holds the inner panels tight.
Step 1: Cut the Stiles (Vertical pieces)
For an 80” tall door, cut your 2x4s to 80”. You need two stiles per door, so four total.
Step 2: Cut the Rails (Horizontal pieces)
The rails run across the top and bottom. If your door is 30” wide, and your stiles are 1.5” thick each, your math is: 30” – (1.5” + 1.5”) = 27”. Cut your top and bottom rails to 27 inches. You will need 4 rails (top and bottom for two doors).
Step 3: Cut the Middle Rail (Optional but recommended)
For doors over 60” tall, you should add a middle rail (lock rail) to prevent racking. This sits roughly 40” up from the bottom. Cut two more 27” pieces.
Step 4: Assemble the Frame
Lay your stiles on a flat surface. Place the rails between them.
- Pre-drill holes (to prevent splitting).
- Apply wood glue to the rail ends.
- Screw through the stile into the rail using 3” exterior screws. You should have a rectangle with a hollow center.
Step 5: Check for Square
Measure diagonally from top left corner to bottom right corner. Then top right to bottom left. If the measurements are identical, your frame is square. If not, push the frame until it matches. This is critical.
Part 3: Creating the Door Panels (The T&G Fill)
Now you fill the hollow center of the frame with T&G boards. These boards will float inside the frame (allow movement for humidity).
Step 1: Cut the Boards
Measure the inside height of your door frame (from the top rail to the bottom rail). Cut your T&G boards to that length. For an 80” door with 4” top and bottom rails, the panel height is roughly 72”.
Step 2: Dry Fit
Lay the frame flat. Place the T&G boards side by side inside the frame. You want them to fill the width perfectly. If you have to rip the last board lengthwise to fit, do it on a table saw.
Step 3: Glue the Tongues (Crucial Step)
Do not glue the boards to the frame (wood movement will crack them). Instead, run a bead of glue into the grooves of each board. Slide the tongues into the grooves.
- Pro tip: Only glue the T&G together, not to the stiles. The assembly should be able to shift microscopically.
Step 4: Clamp and Screw from the Back
Flip the frame over. You should see the back of the T&G boards. Drive a few 1.5” screws through the back of the rails into the top and bottom of the T&G boards. Do not screw through the front face.
Part 4: The Diagonal Brace (Anti-Sag Insurance)
Gravity hates doors. Over time, a 80” tall door will try to turn into a parallelogram. A diagonal brace transfers the weight down to the hinge side.
The Rule of the Brace
The brace must run from the bottom hinge side up to the top latch side.
- Door 1 (Left side): Brace runs from bottom left to top right.
- Door 2 (Right side): Brace runs from bottom right to top left.
How to Install
- Cut a 1×4 or 1×6 board diagonally across the back of the door.
- Mark the angle where it meets the rails. Cut the ends to fit flush inside the frame.
- Use a circular saw to cut the ends at the exact angle.
- Glue and screw the brace into the stiles and rails only. Do not screw the brace into the T&G panels (this restricts movement and causes warping).
Part 5: Installing the Jamb (The Doorway Frame)
You cannot hang a door on thin shed siding. You need a 2×4 or 2×6 jamb.
Step 1: Build the Jamb
Your rough opening is 61” x 81”. Cut:
- 2 side jambs: 81” tall
- 1 head jamb (top): 61” wide
Step 2: Assemble in the Opening
Place the head jamb on top of the side jambs (like a U shape). Set this assembly into your rough opening.
- Use a level on the side jambs. They must be plumb (vertical) and the head must be level (horizontal).
- Drive shims between the jambs and the rough framing to hold them tight.
- Screw through the jamb and shims into the rough framing.
Step 3: The Kerf (Drip Edge)
Take a circular saw and set the depth to 1/4”. Cut a shallow groove (kerf) along the bottom edge of the head jamb. This stops rainwater from wicking back under your door.

Part 6: Hanging the Doors (The Moment of Truth)
This is where patience pays off. You want a 1/8” gap between the two doors and a 1/4” gap at the bottom for clearance.
Step 1: Install the Hinges
Mark your hinge locations on the door jamb. For an 80” door:
- Top hinge: 8” from the top
- Bottom hinge: 10” from the bottom
- Middle hinge: Centered between the top and bottom.
Using a chisel, mortise (cut out) a recess for the hinge leaf so it sits flush with the jamb. Screw the hinges to the jamb.
Step 2: Hang the Inactive Door First
The “inactive” door is the one that stays closed most of the time (usually the left door). Lift the door onto the hinges. Insert the hinge pin. Shim the bottom of the door to hold it at the correct height (1/4” gap).
Step 3: Install Flush Bolts (Top and Bottom)
Drill into the top edge of the inactive door. Install a flush bolt that shoots up into the head jamb. Install another flush bolt at the bottom into the sill. These bolts keep the inactive door locked rigid.
Step 4: Hang the Active Door
Align the active door against the inactive door. You want a 1/8” gap. Screw the hinges to the jamb. Open and close the door. If it binds, add a shim behind a hinge. If the gap is uneven, the jamb is not plumb.

Part 7: Locking, Stopping, and Weatherproofing
A double door has a natural enemy: the gap in the middle.
The Astragal (The Overlap Strip)
The active door needs to overlap the inactive door, or rain will pour through the center crack.
- Close both doors.
- Take a 1×2” board (the astragal).
- Screw it to the outside face of the active door, so it covers the 1/8” gap completely.
- Ensure the astragal does not stop the inactive door’s flush bolts from sliding.
Door Stop Molding
On the inside of the shed, nail 1×2 strips around the perimeter of the jamb. The doors should close against these stops. This creates the seal.
The Lock Set
Drill a hole for a standard latch set on the active door. Install a surface-mounted hasp or a keyed entry knob. For the astragal to work, you need a “dummy” dummy knob on the inactive side.
Weather Stripping (Optional but Smart)
Install rubber bulb weather stripping in the rabbet of the jamb and on the edge of the astragal. This stops drafts, dust, and bugs.
Part 8: Finishing for Longevity
Wood left raw is wood that rots.
Prime Everything
Before you hang the doors (ideally), prime all six sides of the door. Yes, even the top and bottom edges. Moisture enters through end grain fastest.
Paint or Stain
- Paint: Use a high-quality exterior latex. Two coats. Dark colors absorb heat and can warp doors; choose a light/medium color.
- Stain: Use a penetrating oil stain (like Cabot or TimberEx). Reapply every 2 years.
Install the Sill (Threshold)
Water bounces off the ground. Cut a pressure-treated 2×4 or a composite deck board to span the bottom of the opening. Slope it slightly outward so water runs away from the shed.

Common Mistakes (And How to Avoid Them)
Even experienced DIYers mess up double doors. Watch for these traps.
Mistake #1: Forgetting the Center Gap
If you build two doors exactly 30” wide for a 60” opening, they will bind. You must subtract 1/8” for the gap. Build them to 29 7/8” each.
Mistake #2: Skimping on Hinges
Two hinges on a 7-foot door is a disaster. Use three hinges per door (four if using decorative strap hinges). Use 4-inch hinges minimum.
Mistake #3: Gluing the Panels
If you glue the T&G panels into the grooved frame, winter humidity will shrink the wood, and the panel will split. Let them float.
Mistake #4: Inactive Door Sag
Without the top and bottom flush bolts, your inactive door will eventually drag on the ground. Use steel bolts, not plastic.
Advanced Upgrades: Taking It to the Next Level
Once you master the basic double door, consider these upgrades.
Glass Panels
Instead of T&G boards, cut a hole in the door frame and install a piece of 1/4” tempered glass. Use glazing beads to hold it in. This turns your shed into a greenhouse.
Screen Doors
Build a second set of double doors with insect screen mesh. Swap the solid doors for the screen doors in summer. You get the breeze without the bees.
Dutch Door Modification
Cut your double doors horizontally so the top half can open while the bottom stays closed. Great for keeping pets out while letting air in.

Conclusion: Your Shed, Transformed
Making a double door for your shed is a right of passage for a DIYer. It is a project that combines framing, joinery, hanging, and hardware—basically, a little bit of everything. Yes, it takes a weekend. Yes, you will curse the shims. But the first time you roll your lawn tractor straight into the shed without folding the chute or removing the bagger, you will realize it was worth every minute.
You have just added value to your property, functionality to your workspace, and a massive dose of satisfaction to your life. So grab your circular saw, check your level one more time, and build the door your shed deserves.