
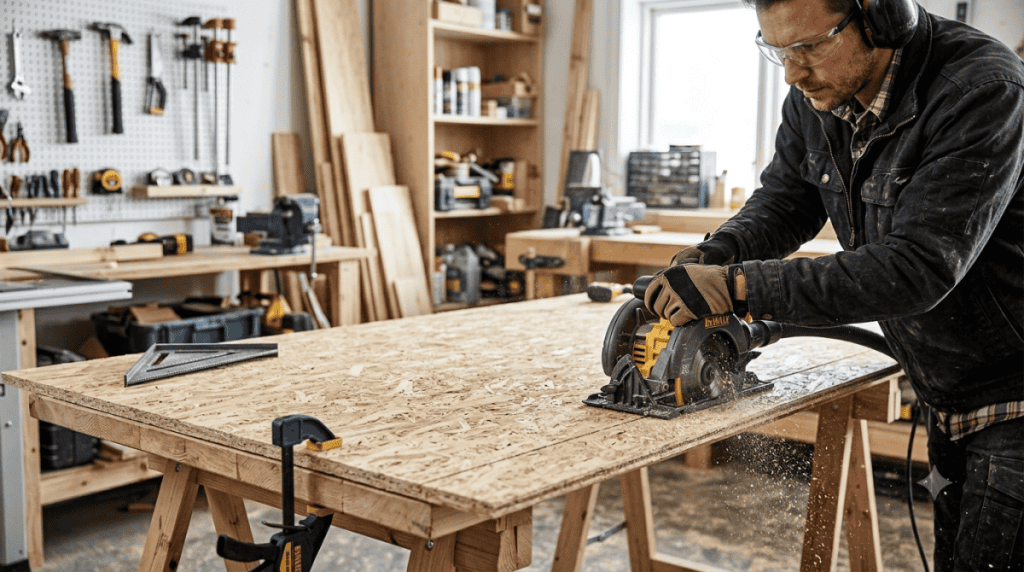
If you’ve ever stood in the middle of a home improvement store, staring at a massive 4×8 sheet of Oriented Strand Board (OSB), you know the feeling. It’s heavy, it’s awkward, and it looks like a giant, splintery waffle. You need it for your project—maybe you’re sheathing a shed, building a subfloor, or crafting some heavy-duty workshop shelving—but the first hurdle is always the same: getting it down to size.
Knowing how to cut OSB isn’t just about making it smaller; it’s about doing so efficiently, safely, and without destroying your power tools in the process. OSB is a unique beast. Unlike plywood, which is made of thin veneers glued together, OSB is composed of large, cross-oriented wood strands compressed with resin. This composition makes it incredibly strong, but it also makes it abrasive.
If you approach cutting OSB the same way you would a piece of pine lumber, you are in for a frustrating experience filled with burning, chipping, and a blade that dulls after three cuts.
In this comprehensive guide, I’m going to break down everything you need to know about cutting OSB. We will cover the tools you need, the techniques to master, and the safety precautions that will keep your workshop safe and your lungs clear of sawdust.
Quick Navigation Menu
Why Cutting OSB is Different (And Harder) Than Plywood
Choosing the Right Saw for Cutting OSB
The Right Blade is Everything When Cutting OSB
How to Cut OSB: Step-by-Step Instructions
How to Cut OSB Without Splintering It
Common Mistakes to Avoid When Cutting OSB
Related Reading
OSB vs Plywood for Shed Walls (Which Is Better?)
What’s Better OSB or Plywood for a Shed Roof?
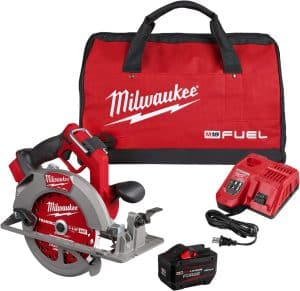 Check out this Milwaukee Cordless Circular Saw
Why Cutting OSB is Different (And Harder) Than Plywood
Before I dive into the “how,” it’s crucial to understand the “why.” OSB is an engineered wood product. It is created by pressing wood strands—usually aspen or southern yellow pine—with a waterproof resin. These strands are laid in specific orientations to give the board its structural integrity.
The Abrasion Factor
The resins used to bind OSB are not just strong; they are hard. They can contain silica and other minerals picked up during the lumber processing. When you run a saw blade through OSB, you aren’t just cutting wood; you are essentially cutting through a rock-hard adhesive matrix. This is the number one reason why blades go dull so quickly when cutting OSB.
The “Splinter Factor”
Because of the directional nature of the strands, OSB is prone to chipping and splintering, particularly on the top and bottom edges of the cut. A dull blade will tear these strands rather than cleanly sever them, leaving you with a ragged, ugly edge.
Choosing the Right Saw for Cutting OSB
The type of saw you use is the most critical variable. The right tool makes the job pleasant; the wrong tool makes it a nightmare. Let’s look at your options.
- The Circular Saw (The Workhorse)
For most DIYers and professionals, the circular saw is the go-to tool for breaking down full 4×8 sheets. Check out Amazons Circular Saws Here.
- Pros: Fast, portable, capable of long straight cuts.
- Cons: Requires a straight edge guide for accuracy; can be intimidating for beginners.
- The Table Saw (The Precision Tool)
If you are ripping down multiple sheets into identical strips, the table saw is unmatched. See Amazons Line of Table Saws Here.
- Pros: Perfect for long, straight, repeatable rip cuts.
- Cons: Handling a massive 4×8 sheet on a small table saw is dangerous and unwieldy. You typically need an outfeed table or a helper to manage the weight.
- The Track Saw (The Upgrade)
Track saws have become increasingly popular, and for good reason. See Them Here on Amazon.
- Pros: Zero tear-out on the top edge (thanks to the scoring feature on some models), incredibly straight cuts, virtually no need for clamps.
- Cons: Expensive compared to a circular saw.
- The Jigsaw (The Detailer)
This is for curved cuts or cutting holes for outlets and plumbing. Here’s Some Jigsaws on Amazon.
- Pros: Versatile, safe, easy to control.
- Cons: Slow, difficult to cut straight lines over long distances, prone to blade bending.
The Right Blade is Everything When Cutting OSB
Let’s get one thing straight: the stock blade that came with your saw is probably garbage. If you want to be able to cut OSB correctly, you must invest in the right blade.
Carbide-Tipped is Mandatory
Do not use high-speed steel (HSS) blades on OSB. You will dull them in minutes. You need a carbide-tipped blade. The carbide teeth are much harder and can withstand the abrasive nature of the OSB resin.
The Tooth Count Debate
This is where people get confused.
- For a Circular Saw: You want a 24-tooth “framing” blade. Wait, “fewer teeth?” you might ask. Yes. A blade with fewer teeth has larger gullets (the spaces between teeth). These large gullets allow for the rapid removal of the large, coarse dust and chips that OSB creates. If you use a high-tooth-count blade (like a 60-tooth finishing blade), the small gullets will clog immediately, causing friction, burning, and motor strain.
- For a Table Saw: A 24-tooth or 40-tooth combination blade works well.
- For a Jigsaw: Use a “down-cut” or “reverse-tooth” blade. Because the teeth are pointed down, they pull the material toward the base of the saw, reducing tear-out on the top face. However, be careful, as they tend to splinter the bottom.
Consider a “Thin Kerf” Blade
A thin-kerf blade removes less material, meaning your saw has to work less hard. This is great for underpowered saws, but be aware that they can deflect slightly if you push the saw too fast.
Check Out Amazons Line Of Circular Saw Blades Here.
How to Cut OSB: Step-by-Step Instructions
Now that we have the gear, let’s get to the actual process. We will break this down into three common scenarios.
Scenario 1: Cutting OSB with a Circular Saw (Ripping and Crosscutting)
This is the most common method for on a jobsite.
Step 1: Measure Twice, Cut Once
Mark your cut line with a sharp pencil. Use a chalk line for long cuts to ensure the line is straight across the entire 8-foot span.
Step 2: Set Up Your Guide
You cannot cut a straight line with a circular saw freehand unless you are a wizard. Use a straight edge guide.
- The Clamp Method: Clamp a long, straight piece of lumber (like a 2×4 or a factory-cut edge of a plywood sheet) to your OSB at the measured offset. Crucial: You must account for the distance between the edge of the saw baseplate and the blade (the offset). Most saws have a guide notch, but you are usually better off measuring the offset yourself (e.g., 1.5 inches) and adding that to your measurement.
- The “Sawboard” Method: Make a zero-clearance track by gluing a strip of 1/4″ hardboard to a piece of 1/2″ plywood. Run your saw along the edge, trimming the hardboard. Now you have a guide that shows you exactly where the blade will cut.
Step 3: The Cut
- Depth Setting: Set the depth of your blade so that the teeth protrude about 1/4 inch below the bottom of the OSB. This reduces friction and prevents the blade from bogging down.
- The Approach: Start the saw and let it come up to full speed before touching the wood. Pushing the saw into the wood before the blade is spinning will cause a violent kickback.
- The Speed: Let the saw do the work. If you see smoke or smell burning resin, you are pushing too fast. Conversely, if you are going too slow, the blade will just spin in place and burn the wood. Listen to the motor; find the “sweet spot” where it sounds consistent.
Step 4: Support the Sheet
This is the most dangerous part of cutting OSB. If the sheet isn’t supported properly, the two pieces you are separating will pinch the blade as the cut finishes. This causes kickback. Check Out Amazons Line of Saw Horses Here.
- Solution: Place the OSB on a couple of 2x4s laid flat on the ground. Make your cut so that the saw passes down the middle of these supports. When you finish the cut, the sawdust falls away, and the OSB pieces drop slightly, preventing the blade from pinching.
Scenario 2: Cutting OSB on a Table Saw
This is efficient but requires heavy lifting.
Step 1: Break it Down
Do not try to wrestle a 4×8 sheet onto a table saw by yourself. Cut the sheet down to a more manageable size with a circular saw first, then use the table saw for the final, precise rips.
Step 2: Use a Splitter or Riving Knife
Make sure your table saw is equipped with a riving knife. This is a metal piece that sits behind the blade and prevents the wood from pinching the back of the blade and kicking back at you.
Step 3: Feed Technique
- Use a push stick. Never put your hands directly over the blade.
- If you are feeding a long piece, use an outfeed roller or a helper to catch the wood as it comes out the back. If the wood starts to lift, it’s dangerous.
Scenario 3: Cutting Curves with a Jigsaw
If your project requires rounded corners or cutouts for light fixtures, the jigsaw is your friend.
Step 1: Clamp it Down
Because the jigsaw blade cuts on the upstroke (usually), it will try to lift the OSB. Clamp your workpiece securely to a workbench.
Step 2: The Blade Choice
Use a down-cut blade. This prevents chipping on the top surface. If you have to use an up-cut blade (which is more common), place painter’s tape along the cut line to help reduce splintering.
Step 3: The Cut
- Do not force the saw. Let the blade move at its own pace.
- Keep the baseplate flat against the OSB at all times.
- For tight curves, use a narrower blade.
How to Cut OSB Without Splintering It
The “splintering” or “tear-out” is a major concern for anyone looking for a clean finish. While OSB isn’t usually a “finish” material, you still want an edge that isn’t falling apart.
Technique 1: Score the Line
Take a sharp utility knife and cut through the top layer of fibers along your pencil line. This severs the top strands before the saw blade gets there, preventing them from being torn upwards.
Technique 2: Painter’s Tape
Cover the cut line on the top (and sometimes the bottom) with painter’s tape. Draw your line on the tape and cut through it. The tape holds the wood fibers down and reduces tear-out.
Technique 3: The “Sacrificial Layer”
Clamp a piece of cheap, scrap lumber (like 1/4″ hardboard or even a piece of Styrofoam) underneath the OSB. When you cut through the OSB, you also cut into the scrap piece. The scrap piece supports the bottom edge of the OSB, preventing the strands from blowing out the bottom as the saw exits the material.
Technique 4: For the Table Saw
If you are using a table saw, use a zero-clearance insert. This is a throat plate that has a tiny slit for the blade rather than a large hole. It supports the wood right up to the edge of the blade, preventing tear-out.
Managing the Dust
When you cut OSB, you generate a massive amount of dust—and it is not nice dust. It contains formaldehyde and other chemical residues from the resins.
- Wear a Mask: This is non-negotiable. A simple dust mask is okay, but an N95 respirator is better. You will see a cloud of brown dust—don’t breathe it in.
- Vacuum Attachments: If you are cutting indoors, hook up a vacuum to your saw’s dust port.
- The “Sawhorse” Trick: If you are cutting outside, set up your sawhorses so the cut line is between them, allowing the dust to fall to the ground (just be sure to clean it up so it doesn’t stain the driveway).
Common Mistakes to Avoid When Cutting OSB
Everyone makes mistakes, but you can avoid the biggest ones by heeding this advice.
- Using the Wrong Side Up
OSB has a “smooth” side and a “rough” side. For a circular saw (which cuts on the upstroke), the tear-out happens on the top of the sheet. Therefore, cut with the “good” side facing down. For a table saw (which cuts on the upstroke as well), the tear-out happens on the top, so face the “good” side up. - Pushing the Saw Too Hard
As mentioned, this burns the wood. OSB burns very easily because of the resin. A black, burned edge is not only ugly, but it also creates a hard carbon edge that will dull your next blade instantly. - Forgetting the Sawdust
Sawdust builds up in front of the blade and on the baseplate. This can cause friction and make the saw drift off-line. Brush it away frequently. - Ignoring the Danger
OSB is heavy. A 4×8 sheet of 3/4″ OSB weighs over 70 pounds. Trying to cut it on your own without proper support is a recipe for a pulled muscle or a dropped sheet on your foot. Don’t be a hero—use a helper or a material cart.
The Best Techniques for Specific OSB Cuts
Sometimes, you aren’t just doing straight cuts.
Cutting Holes in OSB for Receptacles (Plumbing/Electrical)
- Mark the center of the hole.
- Use a spade bit or Forstner bit to drill a pilot hole inside the cutout area.
- Insert the jigsaw blade into the pilot hole and cut towards your lines.
- Pro Tip: Use a drywall saw (hand saw) for small holes if you don’t want to get the jigsaw out.
Cutting Bevels
If you are joining OSB at a 45-degree angle (rare, but possible for corners), you can tilt the baseplate of your circular saw. Be very careful when cutting bevels, as the saw has a higher chance of kicking back. Take slow, steady passes.
Blade Maintenance and Disposal
- Clean the Blade: Resin builds up on the teeth and the body of the blade. Soak the blade in a specialized blade cleaner or Simple Green and scrub it with a brass brush. This reduces friction significantly.
- Know When to Replace: If you have to push harder than usual, or if the cut looks ragged, the blade is toast. Trying to push a dull blade through OSB is a massive waste of time and energy.
- Dust Disposal: Do not vacuum OSB dust with a shop vac that doesn’t have a fine dust filter. The fine particles will clog the filter and blow through the motor. Empty the bag frequently.
Conclusion: Mastering the Cut
Learning to cut OSB is a rite of passage for any DIYer or woodworker. It is a demanding material, but it is also incredibly rewarding to work with when you understand its quirks.
To summarize the core of getting perfect cuts:
- Buy the right blade: A 24-tooth carbide-tipped blade is your best friend.
- Support the board: Never let it pinch the blade.
- Control the splinters: Use tape, scoring, or strategic saw placement (good side down on a circular saw).
- Protect your lungs: Wear a mask.
OSB might not be the prettiest material in the lumberyard, but it is the backbone of modern construction. Whether you are building a house or a doghouse, knowing how to handle this tough material will save you time, money, and frustration.
Now, grab your saw, double-check your measurement, and get to work. And remember: when you master how to cut OSB, you master the art of sheathing itself.