
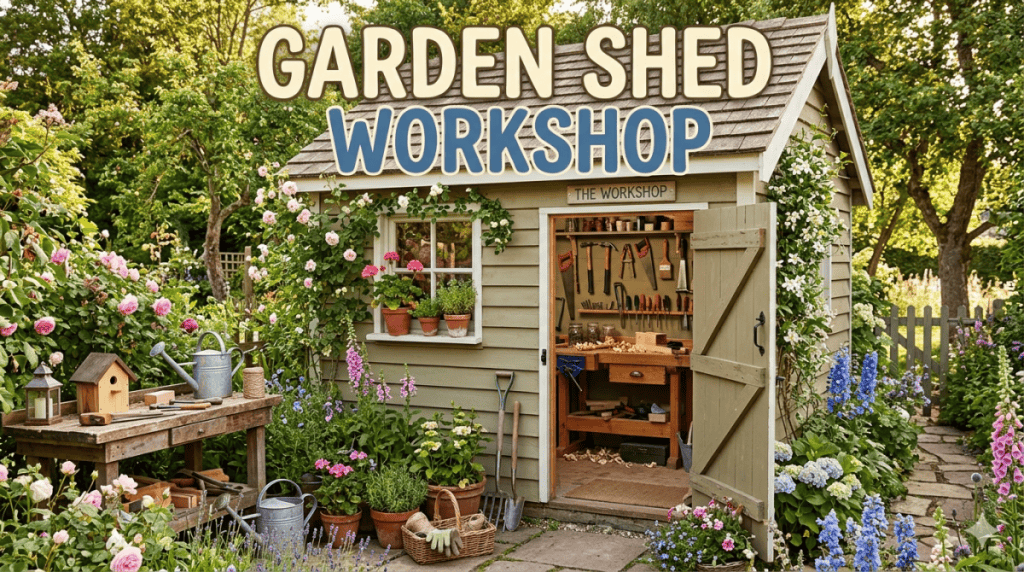
In an era where remote work, DIY culture, and creative hobbies are booming, the demand for dedicated personal space has never been higher. However, not everyone has the luxury of a spare bedroom or a full-sized garage. The solution? A garden shed workshop.
Gone are the days when a shed was merely a dark, cobwebbed corner for rusty shovels and lawnmowers. Today, the garden shed workshop is a symbol of efficiency, creativity, and self-sufficiency. It is a hybrid space that combines the tranquility of a garden with the raw utility of a workbench. Whether you are a weekend woodworker, a jewelry maker, a painter, or a coder needing silence, a well-designed garden shed workshop can drastically improve your productivity and mental well-being.
This 2,500-word guide will walk you through every step of planning, building, equipping, and maintaining the perfect garden shed workshop. By the end, you will understand why this backyard addition is not just a storage unit—it is a launchpad for your passions.

I have broken it down into 8 parts…Enjoy.
Quick Navigation Menu
Part 1: Planning Your Garden Shed Workshop – The Foundation of Success
Part 2: Choosing the Right Structure – Kits vs. Custom vs. Repurposed
Part 3: Essential Features of a Functional Garden Shed Workshop
Part 4: Must-Have Tools and Equipment for Your Garden Shed Workshop
Part 5: Organizing Your Garden Shed Workshop for Maximum Efficiency
Part 6: Common Mistakes to Avoid When Building Your Garden Shed Workshop
Part 7: Real-World Layouts for Different Garden Shed Workshop Sizes
Part 8: Seasonal Maintenance for Your Garden Shed Workshop
Part 1: Planning Your Garden Shed Workshop – The Foundation of Success
Before you hammer a single nail or pour a single bag of concrete, you need a plan. A haphazardly built workshop will lead to frustration, wasted money, and a structure that doesn’t serve your needs. Proper planning involves three critical areas: zoning, purpose, and placement.
Zoning and Legalities
Many homeowners assume that any shed under a certain square footage is exempt from permits. This is often true, but not always. If your shed workshop will include electrical wiring, plumbing (for a sink or toilet), or a concrete foundation, most municipalities will require a permit. Call your local building department. Ask about setbacks—how far the structure must be from property lines. The last thing you want is to build a beautiful garden shed only to be forced to tear it down because it encroaches on a neighbor’s easement.
Defining the “Workshop” Part
A storage shed is for keeping things dormant. Therefore, you need to list your primary activities. Will you be:
-
Woodworking (requires dust extraction, heavy benches, and large tools)?
-
Gardening (requires potting benches, water access, and soil storage)?
-
Electronics (requires anti-static mats, fine lighting, and soldering ventilation)?
-
Art (requires natural north-facing light and wash basins)?
Write down your top three activities. This will dictate the size you’ll need. For woodworking, aim for at least 8×12 feet. For gardening, 6×8 feet might suffice. For a multi-use creative space, 10×16 feet is the “goldilocks” size—big enough for two people to move around, but small enough to fit in most backyards.
Placement and Sunlight
Observe your yard for a week. Where does the morning sun hit? Where does the afternoon storm wind come from? Position your shed so that the prevailing winds hit the smallest wall (to reduce structural stress). If you plan to use it during winter, face the long side south to capture passive solar heat. Avoid low-lying areas where rainwater pools; a wet floor is the enemy of any workshop.
Part 2: Choosing the Right Structure – Kits vs. Custom vs. Repurposed
You have three primary routes to acquiring your shed workshop: buying a prefabricated kit, building from scratch, or repurposing an existing structure.

Prefabricated Kits
For the average DIYer with limited time, a kit is the safest bet. Companies like Tuff Shed, Arrow, or Yardline offer kits that arrive on a pallet with pre-cut lumber and hardware. The pros are speed (assembly takes a weekend) and predictable costs. The cons are customization—most kits have thin walls (2×3 framing) which are terrible for insulation or hanging heavy cabinets. If you buy a kit, upgrade to the “studio” series with 2×4 walls and taller ceilings.
Building from Scratch
If you have carpentry skills, building a custom one is immensely satisfying. You can use advanced framing techniques (24-inch on center) to save lumber, add a loft for extra storage, and integrate clerestory windows for natural light. The cost is roughly 15−35 per square foot, compared to 30−60 for a kit. The downside is the time commitment—expect two to four weekends for a shell, plus interior finishing.
Repurposing a Garden Shed
Do you already have a neglected 6×4 shed? You can convert it into a micro shed workshop. This involves stripping the interior, adding rigid foam insulation, installing a plywood subfloor, and weatherstripping the doors. It’s a low-budget option, but the size limits you to one-person, one-tool activities. Think “writing shed” or “sharpening station,” not “table saw central.”
Foundation Types
Never place your garden shed workshop directly on dirt. Moisture will rot the floor in two years. You have four choices:
-
Skids (Treated runners): Best for small, portable sheds. Sits on gravel. Cheap but prone to frost heave.
-
Concrete Blocks: A step up. Level the blocks, build a frame. Works for 8×10 or smaller.
-
Gravel Pad: Excellent drainage. Dig 4 inches down, add crushed stone, compact it. Ideal for garden shed because it suppresses weeds and allows air flow.
-
Concrete Slab: The gold standard. Expensive (4−8 per sq ft) but prevents rodent intrusion and supports heavy machinery like a lathe or milling machine.
Part 3: Essential Features of a Functional Garden Shed Workshop
This is where we separate a basic shelter from a true workshop. You need to think about electricity, climate control, lighting, and storage.

Electrical Wiring
Running an extension cord from your house is a tripping hazard and a fire risk. Hire an electrician to run buried cable (UF-B wire) from your main house panel to a 60-amp subpanel in the shed. At minimum, install:
-
3 duplex outlets on each wall (spaced 4 feet apart).
-
2 dedicated 20-amp circuits for heavy tools (table saw, heater).
-
A ceiling outlet for a garage door opener (if you install a roll-up door) or a retractable cord reel.
-
Exterior motion-sensor lights for safety.
Lighting
Poor lighting ruins eyesight and causes mistakes. you’ll need layered lighting. Install:
-
Ambient: 4-foot LED shop lights on the ceiling. Aim for 300 lumens per square foot.
-
Task: Adjustable articulating arm lamps over the workbench.
-
Natural: At least one window on the north side for consistent, glare-free light. Avoid south-facing windows unless you live in a cold climate (they cause overheating).
Climate Control – The Non-Negotiable Upgrade
Your tools will rust, your wood will warp, and your paint will freeze if your garden shed workshop isn’t insulated. Do not skip this.
-
Insulation: Use rigid foam board (R-10 to R-13) for walls and the roof. For floors, use EPS foam under a plywood deck.
-
Ventilation: Install a ridge vent and soffit vents to prevent moisture buildup. For dusty work, add a wall-mounted exhaust fan with a louvered cover.
-
Heating: A 1,500-watt oil-filled radiator heater works for mild climates. For freezing winters, install a mini-split heat pump (pricier but provides AC in summer).
-
Cooling: A window unit or a portable evaporative cooler if you live in a dry region.
The Workbench and Storage
The heart of your work area is the workbench. Build it like a tank: 4×4 legs, 3/4-inch plywood top, and a lower shelf for weight. Attach it to the wall studs to prevent wobbling.
-
French Cleats: Install a 4-foot high strip of plywood with angled cleats. This allows you to reconfigure tool holders (hammers, screwdrivers, clamps) instantly.
-
Pegboard: Good for lightweight items, but French cleats are stronger.
-
Overhead Loft: Use the roof truss space for seasonal decorations or infrequently used tools. Never store heavy items over your head.
Part 4: Must-Have Tools and Equipment for Your Garden Shed Workshop
Equipping your workshop depends entirely on your hobby. However, a core set of tools is universal.

For the Woodworker’s Shed
-
Table saw (contractor style, on a mobile base).
-
Compound miter saw (placed near the garage door for long boards).
-
Drill press.
-
Dust collector (2 HP minimum) with blast gates. Critical: Wood dust is explosive and toxic.
-
Bench grinder.
For the Gardener’s Workshop
-
Potting bench with a grated sink.
-
Wall-mounted hose reel with hot/cold mixing valve.
-
Tool sharpening station (files, whetstones).
-
Seed starting shelf with LED grow lights.
-
Compost sifter.
For the Artist’s Studio Shed
-
Heavy-duty easel or drafting table.
-
Solvent-proof storage cabinet (for turpentine, linseed oil).
-
Drying rack for canvases.
-
Sink with a sediment trap (to prevent paint going into the ground).
The Safety Corner (Non-Negotiable)
Every workshop must have a dedicated safety station. Mount a red metal cabinet for:
-
Fire extinguisher (Class ABC for electrical and wood fires).
-
First aid kit (including tweezers for splinters and burn gel).
-
Dust masks (N95 or P100).
-
Ear protection (over-ear muffs, not just foam plugs).
-
Safety glasses (3 pairs—you will lose them).
Part 5: Organizing Your Garden Shed Workshop for Maximum Efficiency
A disorganized work place is a dangerous one. Clutter leads to cuts, falls, and lost time. Use the “zone method” to keep workflow smooth.
Define Five Zones
-
Receiving Zone: Just inside the door. A small table for keys, phone, and water bottle. Also for raw materials you just brought in.
-
Cutting Zone: Near the door or window (for ventilation). Houses the miter saw, table saw, and circular saw.
-
Assembly Zone: The main workbench. Kept completely clear except for the current project.
-
Finishing Zone: Away from ignition sources. For paints, stains, glues, and brushes. Must have a metal trash can for oily rags (spontaneous combustion risk).
-
Storage Zone: Under the workbench or in wall cabinets for raw lumber, screws, and hardware.
Vertical Storage is Your Friend
Your garden shed workshop likely has a small footprint. Maximize wall square footage. Build floor-to-ceiling shelving on one wall. Use magnetic strips for metal tools (wrenches, chisels). Hang ladders and long-handled garden tools on J-hooks. Never leave tools on the floor—that is how you trip onto a table saw blade.

The 5S System (Adapted for Home Use)
Borrow from Japanese manufacturing:
-
Sort: Remove everything you haven’t used in 12 months.
-
Set in Order: Give every tool a painted shadow on the wall. If the shadow is empty, the tool is missing.
-
Shine: Sweep the floor after every session. Wipe down cast iron tool tops with paste wax.
-
Standardize: Create a checklis for closing up (turn off heater, lock door, unplug battery chargers).
-
Sustain: Spend 5 minutes tidying before you leave.
Part 6: Common Mistakes to Avoid When Building Your Garden Shed Workshop
Even experienced builders make errors. Here is what to watch out for.
Mistake #1: Skimping on the Door Size
You buy a standard 30-inch walk door for your shed workshop. A year later, you buy a band saw. It won’t fit through the door. Solution: Install a double door (60 inches wide) or a roll-up garage door (8×7 feet). Even if you don’t need it now, the resale value skyrockets.
Mistake #2: Ignoring the Floor Loading
You pour a 2-inch concrete slab. Then you buy a 500-pound cast iron jointer. The slab cracks. Your floor should be 4 inches thick with rebar or wire mesh for heavy machinery. For wood floors, use 2×6 joists on 12-inch centers, not 24-inch.
Mistake #3: Forgetting Security
A garden shed workshop is full of expensive, portable tools (drills, saws, chargers). Standard shed windows are easy to pry open. Install:
-
Polycarbonate windows (unbreakable) instead of glass.
-
A heavy-duty hasp with a shrouded padlock (bolt cutters can’t reach).
-
A $30 WiFi motion alarm that sends alerts to your phone.
-
Motion-sensor floodlights.
Mistake #4: Poor Dust Management
You wear a cheap mask, but you don’t have a dust collector. Fine particulate matter (under 2.5 microns) accumulates in your lungs. Wood dust is also a carcinogen. For any workshop with power tools, you need a dust collector outside the shed, or at least a shop vacuum with a cyclone separator and a HEPA filter.
Mistake #5: No Insulation in the Roof
You insulate the walls perfectly, but you leave the roof uninsulated. On a sunny day, it becomes a pizza oven. Heat radiates down from the hot roof sheathing. Always insulate the roof rafters with rigid foam or fiberglass batts, and leave an air gap for the ridge vent.
Part 7: Real-World Layouts for Different Garden Shed Workshop Sizes
Let’s put theory into practice with three specific floor plans.
The Micro (6×8 feet – 48 sq ft)
Best for: Sharpening, electronics, writing, or a single standing bench.
-
Layout: Workbench covers the entire 8-foot back wall. French cleats above it. Mobile cart in the center that rolls out the door. No table saw—use a track saw on the bench. Ceiling-mounted reel for power. Loft storage above the door for suitcases.
The Standard (10×12 feet – 120 sq ft)
Best for: General woodworking, gardening, or craft jewelry.
-
Layout: Table saw on a mobile base in the center. Miter saw station against the left wall. Assembly bench on the right wall. Windows on the north and east walls. Dust collector in a sound-insulated closet in the corner. 8-foot double doors on the south wall for bringing in plywood.
The Dream (12×20 feet – 240 sq ft)
Best for: Professional-grade woodworking, car restoration (small), or a shared pottery/painting studio.
-
Layout: Separate finishing room (for spray paint) with an explosion-proof fan. Lumber rack along the entire 20-foot back wall. Overhead air filtration unit. Mini-split HVAC. Sink with hot water. 10-foot ceilings with LED high-bay lights.
Part 8: Seasonal Maintenance for Your Garden Shed Workshop
To ensure your garden shed workshop lasts 30 years, you need a seasonal checklist.
Spring (Post-Frost)
-
Inspect the roof for shingle damage from winter winds.
-
Check for rodent nests (mice love insulation). Place traps.
-
Lubricate door hinges and lock mechanisms.
-
Test the GFCI outlets.
Summer
-
Clean the dust collector filter.
-
Check the caulking around windows; reapply if cracked.
-
Trim back any bushes or tree branches touching the shed (rodent highways).
-
Monitor humidity; use a dehumidifier if above 60% to prevent tool rust.
Fall
-
Drain and store garden hoses if you have outdoor water.
-
Add weatherstripping to the door sweep.
-
Bring in sensitive finishes (paints, glues) that freeze.
-
Test the heater before the first cold snap.
Winter
-
Keep snow cleared from the roof (snow is heavy—wet snow can be 20 lbs per cubic foot).
-
Never use a propane or kerosene heater indoors (carbon monoxide risk). Stick to electric.
-
Open cabinet doors slightly on very cold nights to allow air circulation around plumbing (if installed).
Conclusion: Your Garden Shed Workshop Awaits
Creating a workshop is more than a construction project—it is an act of self-definition. It is a declaration that your hobbies matter, that your craft deserves a dedicated space, and that a small corner of the world is yours to build, fix, or create.
From the initial zoning permit to the final coat of paint on your French cleats, every step is an investment in your own productivity. A well-built garden shed workshop adds tangible value to your property—real estate agents estimate a 50-70% return on investment for a quality shed. But the intangible returns are greater: the hours of uninterrupted focus, the satisfaction of a well-organized tool wall, and the quiet joy of walking across your dewy lawn to a space that is wholly your own.
Do not wait for the “perfect time” or a bigger garage. Start small. Clear a corner of your yard. Sketch a layout on graph paper. Save for the materials. Whether you convert a plastic resin box or pour a concrete slab for a 20×20 cathedral-ceiling masterpiece, the journey is the same. Every master craftsperson began with a single shelf and a single tool.
So, open that catalog, fire up the circular saw, and break ground. Your garden shed workshop is not a dream—it is a project with a blueprint. And the first step is right outside your back door.