
When most people think of adding a shed to their property, they picture a spacious backyard with room to swing a hammer and back up a delivery truck. But what if your only available space is that forgotten ribbon of land running down the side of your house? That narrow, often muddy, HVAC-unit-hugging alley is where shed dreams go to die. Standard building plans assume you have four feet of clearance on every side. You don’t. And most online tutorials gloss over the brutal realities of working in a corridor: how do you level a foundation when you can’t fit a wheelbarrow? How do you sheath a wall when you can barely turn around?
The truth is, building a side yard shed isn’t about following a big-box store’s prefab kit instructions. It’s about embracing a completely different mindset—one that prioritizes modular assembly, unconventional foundations, and ruthless space optimization. Over years of building in tight spaces and watching other DIYers struggle, I’ve collected a set of practical “hacks” that rarely appear in the glossy magazines or YouTube videos. These aren’t gimmicks; they’re survival strategies. Below, I’ll break down four lesser-known techniques that will turn your side yard from an impossible site into the perfect spot for a functional, long-lasting shed.

Site Prep: Mastering Your Foundation
The biggest mistake you can make in a side yard is treating the foundation like you would in an open field. You don’t have room for a concrete mixer, a rebar grid, or a full day of formwork. The “hack” here is to abandon the slab entirely unless you have professional help. Instead, use a gravel base with concrete pier blocks. Dig down about eight inches, compact a layer of crushed stone (3/4″ minus works well), and set precast pier blocks at the corners and every four feet along the length. These blocks are small enough to carry one at a time, and they allow you to level each point independently using a laser or a long spirit level.
Why doesn’t anyone talk about this? Because it’s less glamorous than pouring a slab. But for a side yard, it’s superior: it provides excellent drainage, eliminates frost heave concerns in most climates, and—crucially—lets you adjust the height after the fact. Once your piers are in, build a pressure-treated floor frame with 2×6 joists on top of them. That elevated floor is your second non-negotiable “hack.” Without it, moisture from the ground will wick into your stored items, rusting tools and rotting cardboard boxes within a single season. The air gap underneath is your silent guardian.
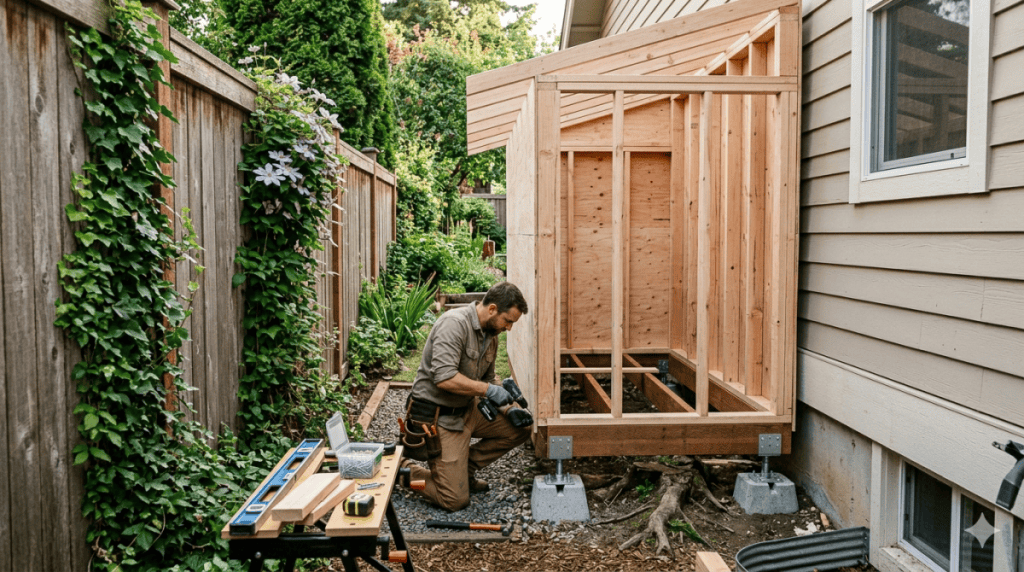
The “Lego” Building Method
Standard shed construction involves building walls on the ground and tipping them up. In a side yard, you often don’t have the horizontal space to lay out a full 8-foot wall. The workaround is to build in modular sections—think of them as giant Legos. Frame your walls as 4-foot-wide panels instead of one long 12-foot wall. A 4×8 sheet of plywood sheathing becomes your template: lay it flat, frame a rectangle that matches its dimensions with 2x4s on 16-inch centers, then screw the sheathing on. Now you have a rigid, lightweight panel that you can carry sideways down your narrow path.

Once you’ve built three or four of these panels, assemble them in place like a puzzle. Use a cordless impact driver and a level to plumb each panel, screwing them together through the adjacent studs. This method solves the “no room to tilt” problem because you’re standing the panels up one at a time, each only two feet wide. The “hack” that no one mentions? Use 2×3 studs instead of 2x4s for non-load-bearing walls. In a side yard, every inch counts, and shaving an inch off each wall’s depth can give you critical interior width. For a 6-foot-wide side yard, the difference between 2×4 and 2×3 framing is the difference between being able to store a wheelbarrow or not.
Pro-Tips for Pros (and Ambitious DIYers)
If you want your side yard shed to feel like a legitimate workshop rather than a glorified closet, you need to think about utilities and longevity. The advanced “hack” here is off-grid solar for lighting and charging. Running an underground electrical line to a side yard is often impossible because you’d have to trench through concrete paths, under fences, or across gas lines. Instead, buy a small 50-watt solar panel, a deep-cycle marine battery, and a charge controller. Mount the panel on the roof (south-facing if you’re in the northern hemisphere). Wire in a few LED strip lights and a USB outlet. Total cost: under $200. You now have light for evening tool retrieval and a place to charge your phone or drill batteries. This is almost never discussed in standard shed plans, yet it’s a game-changer.
Another pro-level trick: reinforce your gravel base against erosion. If you do use a gravel pad instead of piers, side yards are prone to washout because water runs off the house’s roof and down the narrow channel. Dig a shallow trench (about 6 inches deep and wide) around the perimeter of your gravel area and fill it with larger “rip-rap” stones or pour a small curb of bagged concrete mix. This “French drain edge” keeps the smaller gravel from migrating into your neighbor’s yard or down the storm drain. It’s a ten-minute job that will save you from re-leveling your shed every spring.

The Unsung Hero: Smart Storage
You’ve built the shed. Now comes the part that 90% of DIYers botch: the interior. A side yard shed is inevitably narrow—often only four to five feet wide. If you just throw your tools and bins inside, you’ll create an unusable obstacle course. The “hack” is to treat every surface as storage, including the ceiling and the doors. Install a 2×4 “cleat” horizontally along the back wall at shoulder height, then screw in heavy-duty hooks to hang ladders, shovels, and rakes vertically. Above that, build a shallow loft (12 inches deep) that runs the full length of the shed. Use it for seasonal items like Christmas decorations or camping gear—things you don’t need daily.
The truly clever trick, however, is the door-mounted organizer. The inside of your shed’s double doors (or single wide door) is a blank canvas. Attach a sheet of 1/2-inch plywood to the door, then cover it with pegboard or slatwall. Now the door becomes a place for small hand tools, spray cans, tape measures, and gloves. When you open the door, everything is presented to you like a cockpit. When closed, it disappears. No one talks about this because it requires a bit of extra hinge reinforcement (use at least three heavy-duty hinges per door), but the payoff in usable floor space is enormous. Finally, never forget the golden rule of small sheds: if it touches the floor, it’s wrong. Everything goes on a wall, a hook, a shelf, or a door.
Building in a side yard forces you to be clever, not strong. By embracing these four overlooked strategies—modular foundations, Lego-like framing, off-grid power, and obsessive vertical storage—you can transform that useless strip of land into one of the most satisfying DIY projects you’ll ever complete. The neighbors will ask how you fit it in. Just tell them it’s a secret.