
Condensation in your shed can not only cause mold, mildew, and eventually rot inside your shed, but can also damage your tools and machinery by causing rust. If you have not yet built or installed your shed, you’re in luck, because there are several methods to prevent condensation in the first place. Some of these are just not possible to do once the shed is in place or are a lot harder to accomplish.
Fortunately, one of the best ways to deal with condensation is to make sure you have adequate ventilation and can be addressed after the shed is built. It keeps the air moving through your shed, and condensation has a harder time forming in moving air.
Additionally, it keeps the outside and inside temperatures more similar. The temperature difference is a factor in moisture condensation.
How Can I Stop Condensation Under My Shed Roof?
Condensation on the underside of a shed roof is most prevalent in plastic sheds and especially in all-metal sheds or sheds with a metal roof. The metal gets cool at night and warms more slowly than the outside air unless sunlight is hitting it directly. Any moisture present in the air inside the shed will rise with the warmer air, allowing moisture to condense on the cooler metal. Sheds with a concrete floor are more prone to have some moisture in the shed.
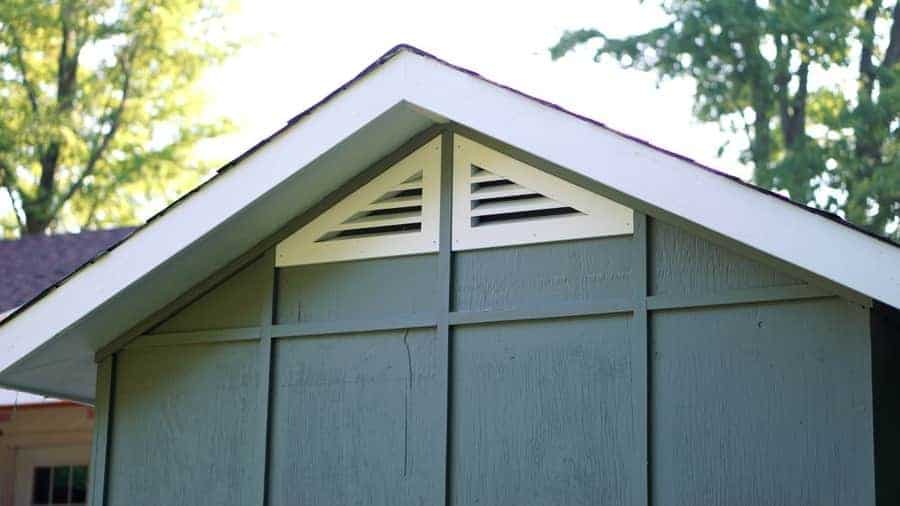
Ventilation in your shed is the best way to keep moisture from building up in your shed in the first place, which will limit the moisture condensing inside the roof. If you have a shed with a gable roof, it’s fairly easy to install vents on either end.
You’ll find that most homes have the same kind of vents. If you have a lean-to roof with one slope, install your vents into the sidewalls on the higher end. You may even want to install a couple along the high side of your shed. You can also install insulation underneath the roof.
How to Stop Condensation in a Shed with a Concrete Floor?
Hopefully, you installed a vapor barrier underneath the concrete before it was poured. This will help a lot towards reducing moisture. There are sealants made for concrete that may help. A building supply store should be able to help you with this. As mentioned, ventilation is key to preventing moisture. Another is to keep the air moving. A fan placed on the floor to move the air around at that level will help.
Using dehumidifying agents will help. Cloth bags filled with charcoal briquettes or non-clumping kitty litter will help absorb moisture. You’ll need to replace them every so often, but it can be hard to tell when to do this. There are moisture-absorbing kits with refills available that tell you when they need replacement and are not costly.
You can install plastic sheeting over your slab inside and up the walls a few inches. Cover this with old carpeting, linoleum, or some type of flooring to keep the plastic from getting ripped from tools and traffic.
How to Prevent Condensation in a Metal Shed?
Planning your shed location is an important first step. Put your shed on higher ground if possible, or at least keep it from low spots where water can collect. Whether you plan to have a gravel or concrete shed base, installing a vapor barrier underneath either of these is a great step. Putting in gravel all around the shed will also help catch the rain that runs off the roof and lead it away from the shed.
If you have a lot of rain, you may want to install a more sophisticated drainage system, such as a French drain to steer the water away.
Adequate ventilation is an essential part of keeping moisture out and keeping it from condensing inside your shed. Even if you don’t have a metal shed, excess moisture can condense on any metal items inside your shed, leading to potential rusting problems. Install vents on either end of your shed walls near the roof. You may need to install vents on the long sides also just under the eaves if you live in a humid area.
While heaters can dry the air and prevent some moisture from causing problems, unvented heaters can actually contribute to the problem. This is because the heaters warm the air, which gives it the ability to hold more moisture.
How to Prevent Condensation in a Plastic Shed?
If you have a plastic shed small enough to be moved, a good plan would be to move the shed and install a base raised on beams to allow airflow underneath the shed, then replace the shed. If your shed doesn’t have a floor, you can build a floor over the beams first.
If you don’t have at least a gravel base underneath, build one first, then build your base over that. The gravel base should be built at least a foot larger all the way around to provide drainage outside of the shed.
Look for any leaks in your shed. Windblown debris can cause cracks in the plastic, especially as it ages or is exposed to a lot of sun, and these can let in moisture. There are also products that absorb moisture that can be purchased that signal when they need to be replaced, or you can use charcoal for this.
Wrap the charcoal in a cloth bag, preferably cloth with a loose weave, and hang the bags in your shed in a place where they won’t come in contact with anything else, as charcoal may stain some items. Replace your bags regularly to make sure they keep absorbing moisture.
How to Prevent Condensation in Wooden Shed
If you haven’t built or installed your shed yet, plan to build a raised platform or floor to allow air to flow underneath and keep it off the ground. Even with a gravel base, this is important, and raising it above a concrete slab is also. Keep plants from touching the shed.
A lot of plantings around the shed can hold extra moisture in the ground, releasing it as conditions allow, so don’t try to hide the shed with a lot of bushes. Go over the outside of the shed with caulk, using it around all windows, doors, vents and trim. Also, apply it on any seams where the siding sections connect and where the sides meet the roof.
While you have caulked all these places when the shed was built or installed, it needs to be checked periodically. Caulk does deteriorate after a time and can fall off in places. Dried out and cracked caulk is just waiting to fall, so it may be a good idea to remove it and reapply.
While insulation helps a great deal, the most important thing is ventilation. Vents at the gables help a great deal, while additional vents under the roofing on the long sides may also be necessary. If your considering adding insulation to your shed read my article What’s the Best Insulation for a Shed? [Batt, rigid or loose fill?] for the best options.
Do I Need a Dehumidifier in My Shed?
You may need a dehumidifier if you have condensation problems in your shed and you don’t have adequate ventilation. If you plan to add ventilation and insulation, a humidifier to temporarily dry your shed thoroughly before you begin work will help. You surely don’t want to install insulation next to damp studs.
It’s far better to just add adequate ventilation, but if you live in a humid area, you may need to use a dehumidifier from time to time. Just be aware that it will draw outside air through the vents and may not work as thoroughly, so cover your vents when you use it.
Should I Add a Window That Opens in My Shed?
A window will help a great deal to aid in keeping your shed from being damp inside. Keep it open all day if you’re home along with the door, such as on a weekend, and the weather permits. If you need to be gone all day, you can purchase locks that allow your window to be opened only a certain distance. Remember to shut your shed window in the evenings to keep the damp night air out.
How Can I Stop Condensation from Happening?
Prevention is always much easier than fixing a problem. It starts before you ever start building or installing your shed. Be careful to put your shed on higher ground if possible, or at least keep it out of places where water pools. Keeping out of the natural places where water runs during heavy rains is also important. Check out my article How High Should a Shed Be Off the Ground? for ideas and tips for keeping the underside of your shed dry.
Your shed base is the next important step. Whether putting a concrete slab down or creating a gravel base, a vapor barrier should be placed underneath the foundation next to the ground. Digging around the shed a foot or two and putting in gravel also helps to drain away runoff from the roof. If you still notice standing water around your shed, you may need to install a French drain to get the water to drain away. Read my article Do I Need a Vapor Barrier Under My Shed? for more information on vapor barriers.
Consider ways to raise your shed above the base a few inches. While this may mean that you’ll need a low ramp for your wheeled yard machines, it will save you money and trouble in the long run. Building your shed on skids or beams to raise it will allow airflow underneath the shed, causing moisture to dissipate instead of collecting and looking for a way to seep into your shed.
Caulking around all seams, windows and doors is important, as well as where the roof joins the walls. Inspect the caulk regularly and replace any that is missing or looks cracked as it may fall out later.
Ventilation is vital to keeping moisture problems out of your shed. Gable vents are easy to install and go a long way towards keeping the air moving inside. Be sure to install one at each end. Moving air keeps moisture from settling on surfaces. A ridge vent in the roof keeps moisture out as well, as warm air moving through it carries moisture.
It will also keep your shed cooler in summer. Since warm air holds more moisture than cool air, this will also help keep the moisture out. Consider one with a turbine top. When warm air rises, it catches the fins that cause the turbine to turn, which helps it draw even more air out. It’s almost like having a fan installed in your roof and operates automatically.
Insulation can also help. Spray foam insulation coats the inside and is easy to apply once you get the knack. While it’s more expensive than fiberglass batts or rolls, it expands while drying to get into all the crevices, ensuring that any potential air leaks are covered. Of course, if this is not feasible, fiberglass or foam board insulation helps as well.
Keep your roof in good shape. While people know they should inspect their house roof from time to time, some don’t realize that the shed roof needs checking also. Replace damaged shingles or other roofing material to prevent leaks. Even a cracked shingle can allow moisture to collect under it, eventually making its way through the sheathing and affecting your shed’s interior.
If you don’t have a window, consider installing one, preferably opposite the door. This will allow you to air out the shed whenever you’re home during the day.
Keep damp items from going into your shed to add to the moisture problem. Pool toys or items that are wet from rain should be dried out thoroughly before putting them into the shed. If you have a concrete floor, you may be tempted to wash out the dirt and leaves with a hose, but this is not a good idea. You’ll only add to the moisture problem.
Conclusion
Moisture problems occur when there is humidity in the air or in the ground. From the ground, it seeps into or onto whatever it touches. Keeping it out of your shed starts with the location and foundation. Continuing efforts include ventilation, in effect, any way to keep the air moving. Moisture can only gather in still air, so keeping the air moving whatever way you can is the most important thing you can do once your shed is built.