
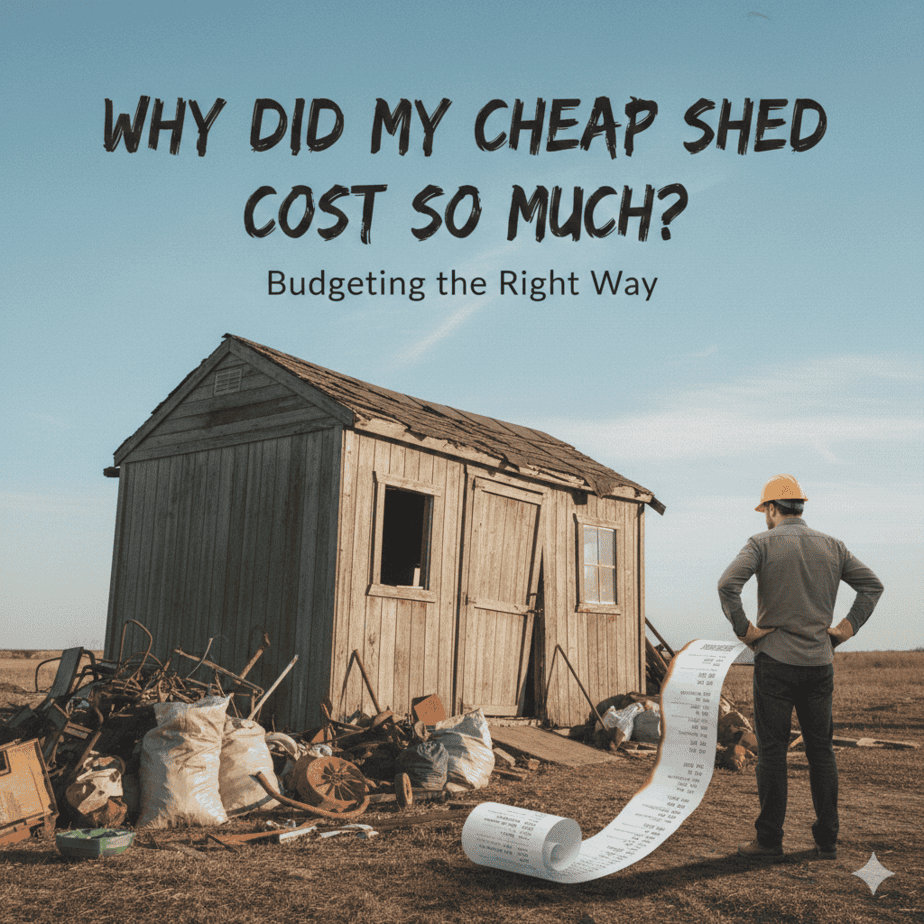
We have all been there. You carve out a corner of the backyard for a new storage solution, dreaming of a tidy space to stash the lawnmower, gardening tools, and bicycles. You set what feels like a reasonable budget, only to find yourself staring at a receipt total that is double what you expected.
If you have ever asked yourself, “Why did my ‘cheap shed’ cost so much?”, you are not alone. The gap between the vision of a budget-friendly outbuilding and the reality of the final bill is a common tale in the world of DIY.
The good news is that a costly shed isn’t inevitable. The secret lies in understanding exactly where your money goes and strategically planning your approach. Whether you are researching how to build a shed for the first time or looking for ways to cut costs on your next project, this guide will walk you through budgeting the right way. I will explore the true costs involved and, most importantly, detail how to find budget materials to build a shed without sacrificing quality.

The Sticker Shock: Why “Cheap” Isn’t Always Cheap
The first mistake many homeowners make is confusing a low initial price tag with a low final cost. When we decide to build a shed, we often look at lumber prices and think, “I can do this for a few hundred dollars.” However, the cost of lumber is just the tip of the iceberg.
A DIY build comes with a host of hidden expenses that creep up on you. There are the fasteners—screws, nails, brackets, and ties—which can easily add up to over a hundred dollars. Then there is the waterproofing membrane, the flashing for the roof, the hinges for the door, and the hasp for the lock.
If you are learning how to build a storage shed as you go, there are also the “oops” costs—the extra board you need because you miscut a rafter or the replacement for the piece that warped after sitting in the rain.
Furthermore, a successful build requires tools. If you are starting from scratch, the cost of a circular saw, drill, level, framing square, and possibly a nail gun can add $500 or more to your project before you even buy a single 2×4.
By the time you factor in the delivery fees for gravel or lumber, the permit fees, and the cost of your own time, that “cheap” shed can become a significant investment. The key to avoiding this is to budget the right way: account for everything before you start.

5 Steps for Budgeting Your Shed Build.
Quick Navigation Menu
Step 1: Planning and Design – The Blueprint for Savings
Step 2: The Foundation – Getting Grounded on Costs
Step 3: Sourcing Budget Materials – The Art of the Hunt
Step 4: Choosing Your Materials – Cost vs. Longevity
Step 5: The Construction – Putting It All Together
Related Reading
I Want a Shed… Now What? How to Start Without Getting Overwhelmed
How Do I Choose the Best Shed Plans? (Paid and Free)
Choosing a Shed Design That Matches Your Skill Level
Planning a Shed Building Timeline That Won’t Break Your Spirit
Choosing the Right Shed Size for Your Yard Size
Why Don’t My Shed Walls Line Up?
Step 1: Planning and Design – The Blueprint for Savings
Before you even pick up a hammer, the most crucial step in learning how to build a shed on a budget is the planning phase. A well-thought-out plan prevents costly mistakes and material waste.
Free vs. Paid Plans
You don’t need to spend a fortune on architectural drawings. There are numerous websites that offer free, detailed shed plans designed with cost-efficiency in mind. These plans often include a comprehensive materials list, which is your golden ticket to budgeting. By knowing exactly how many sheets of plywood and how many 2x4s you need, you can avoid guesswork and the expensive “just-in-case” buying that leads to piles of unused offcuts. Check out this article How Do I Choose the Best Shed Plans? (Paid and Free) for more information on Paid shed plan vs free Shed plans.
Size and Complexity Matter
When you decide to build a shed, the design you choose has a direct impact on your wallet. A simple, rectangular box with a single-sloped (lean-to) roof uses significantly less material and is simpler to frame than a complex gable roof design.

Every corner, every angle, and every window adds complexity and cost. For a budget-focused project, stick to the basics. You can always add aesthetic details later, but the structure itself should be as simple as possible to maximize efficiency.
Step 2: The Foundation – Getting Grounded on Costs
One of the most overlooked aspects of building a shed is the foundation. A shed needs a stable, level, and dry base to survive for years to come. However, you don’t need to pour an expensive concrete slab to achieve this.
Gravel and Skid Foundation
For many DIYers, the most cost-effective approach is a gravel pad with wooden skids. This involves digging a shallow area, filling it with compacted gravel, and laying pressure-treated 6×6 timbers directly on top. This method provides excellent drainage, preventing the wood of your shed floor from rotting. Gravel is relatively inexpensive, and this approach requires no concrete work, saving you money on both materials and specialized labor.
Concrete Block Options
If you want to keep your floor frame off the ground, you can use concrete deck blocks. These are affordable (often less than $10 each) and are placed directly on compacted soil or a small gravel pad . They have notches designed to hold standard lumber, making them a quick and easy foundation solution. This is particularly useful if you are building on a slight slope, as you can add or remove gravel to level each block individually. Check out this article What’s The Best Shed Foundation Option For You? I go over the top 9 shed foundations options.
Step 3: Sourcing Budget Materials – The Art of the Hunt
This is where the real savings happen. Knowing where to look for materials can slash your budget by 40% or more. When you ask, “How can I build a shed for less?”, the answer often lies in alternative sourcing.
Local Lumber Yards and Discount Outlets
While big-box home improvement stores are convenient, they are not always the cheapest. Local lumber yards often have overstock, “cull” piles (lumber with minor cosmetic defects that is perfectly fine for structural use), or seasonal clearance sales. You can often negotiate a better price, especially if you are buying in bulk. An 8-foot 2×4 from a local discount outlet might cost $3.00 compared to $5.40 at a national chain, representing significant savings when you need 50 or 60 of them.
Reclaimed and Salvaged Wood
For those with patience and a truck, reclaimed wood is a goldmine. Check Facebook Marketplace, Craigslist, or apps like Material Exchange for people giving away or cheaply selling old lumber from demolition projects. Pallets are another incredible resource.

While not all pallets are created equal, many are made of sturdy hardwood and can be disassembled to provide free lumber for siding or even framing. Always inspect reclaimed wood for rot, excessive knots, or nails, and make sure to remove all metal before milling or cutting.
Online Marketplaces
Don’t underestimate the power of online classifieds. People frequently sell leftover materials from their own building a shed projects at a fraction of the retail cost. You might find a bundle of shingles, a stack of perfectly good siding, or a roll of house wrap for 50% off.
This is also an excellent place to look for doors and windows. Instead of buying new, you can find a used window or a solid-core door at a salvage yard or online for a fraction of the price.
Wholesale Clubs and Bulk Buying
If you have the storage space and the upfront capital, buying materials in bulk can lead to substantial savings. Stores like Costco or lumber cooperatives offer members discounted prices on large quantities of lumber, roofing, and fasteners. If you don’t need that much material, consider teaming up with a neighbor or friend who is also planning a project and splitting the bulk purchase.
Step 4: Choosing Your Materials – Cost vs. Longevity
When you build a shed, the materials you choose dictate both the upfront cost and the long-term maintenance. It’s a balancing act.
Lumber: For the floor frame (joists and skids), you must use pressure-treated lumber to resist rot and insects. For the wall framing, standard stud-grade lumber is fine. For sheathing, consider oriented strand board (OSB) instead of plywood. OSB is significantly cheaper and, while not as pretty, it provides excellent structural rigidity when covered properly by siding and roofing.
Siding: While T1-11 plywood siding is a common choice, it can be pricey. For a truly budget-friendly shed, consider using the same OSB you used for sheathing as your final siding, then painting it or covering it with a weather-resistant house wrap and strapping. Alternatively, corrugated metal panels are durable, weather-resistant, and often competitively priced with mid-range wood siding.
Roofing: Asphalt shingles are the standard for a reason—they are affordable, easy to install, and readily available. However, if you are looking for a longer-lasting solution that requires less maintenance, corrugated metal roofing is a great alternative. While the material cost per square foot can be comparable or slightly higher than basic shingles, its longevity and durability can make it more cost-effective over the life of the shed.

Metal vs. Wood: For the ultimate in low-cost and low-maintenance, you might even consider a metal shed kit. Galvanized steel sheds are incredibly durable, fire-resistant, and impervious to rot and pests. While you might not get the same aesthetic charm as wood, the price point for kits—sometimes as low as $260 for a small lean-to or $330 for an 8×10 model—is hard to beat when you are on a strict budget. A forum user noted that when comparing square footage per dollar, steel sheds often come out on top. You can check out metal shed kits and complete metal shed Here on Amazon.
Step 5: The Construction – Putting It All Together
With your materials sourced and your foundation prepped, it’s time for the actual building a shed process.
Frame Walls on the Deck
To ensure your walls are perfectly square and straight, assemble them flat on the shed floor deck. Snap chalk lines on the deck to indicate the inside edge of the walls. Build the wall frames, install the sheathing or siding while they are flat (which is much easier than doing it standing up), and then raise them into place. This “modular” construction method saves time and ensures accuracy.
Simple Roof Framing
For a budget build, stick to simple roof framing. Pre-fabricate your rafters on the ground using a pattern to ensure each one is identical. If you are using a gable roof, build the roof panels flat on the ground or on the shed platform. This allows you to install the soffits and any roof sheathing safely at ground level before lifting the sections into place with a helper.
The Door
Building a door can be tricky. A sagging door is a common issue in DIY sheds. To save money and headaches, consider building a simple Z-bar door using T1-11 or plywood. If you have sourced a pre-hung exterior door from a salvage yard, even better—this ensures a perfect fit and smooth operation.

Conclusion
So, why did your “cheap shed” cost so much? Likely because the “hidden” costs of tools, fasteners, foundations, and mistakes weren’t factored into the initial estimate. However, by budgeting the right way, you can take control of the process.
Building a shed on a budget isn’t about cutting corners; it’s about smart planning and resourceful sourcing. It’s about knowing how can I build a shed using reclaimed windows from the habitat restore, framing lumber from a local discount yard, and a foundation of compacted gravel. It’s about understanding that a simple design is not only cheaper but often more durable and easier to maintain.
Whether you decide to build from scratch using meticulously sourced budget materials or opt for the straightforward value of a metal kit, the key to success is the same: plan meticulously, source creatively, and build smartly. By doing so, you can finally answer the question of how to build a storage shed that is both kind to your backyard and your bank account.