
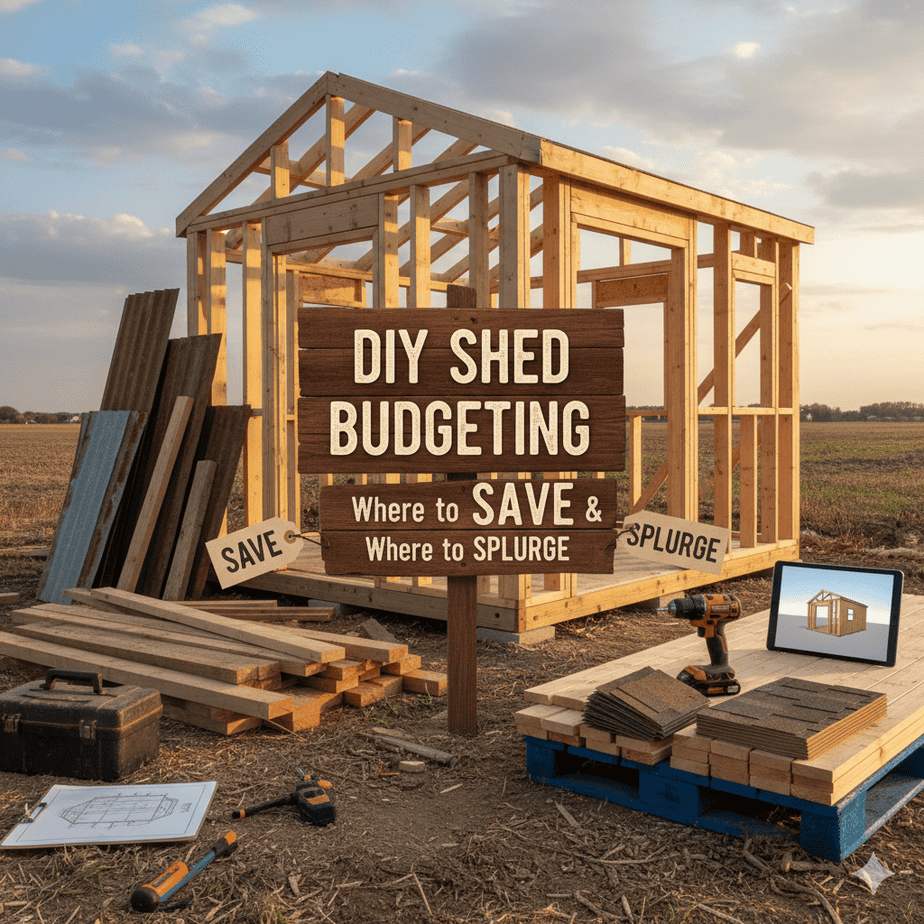
Embarking on a DIY shed project is an exciting venture. It’s the promise of a new space, a workshop, a garden sanctuary, a clutter-free storage solution, all built by your own hands. Yet, nestled between the dream and the finished structure lies the crucial, and often daunting, realm of budgeting. A well-planned budget is the blueprint for your project’s financial success.
Getting it wrong can lead to a half-finished eyesore or a building that fails to stand the test of time. The key to navigating this financial landscape isn’t about pinching every penny; it’s about strategic allocation. It’s knowing which corners you can safely cut and which components demand a more generous investment. This guide will walk you through the intelligent art of DIY shed budgeting, highlighting exactly where to save and where to splurge.

Quick Navigation Menu
Where to Save and Where to Splurge on Your Shed
Smart Savings Without Sacrificing Integrity
Strategic Investments for Long-Term Value
Where to Save and Where to Splurge on Your Shed
Before we dive into specific materials, it’s essential to adopt the right mindset. A DIY shed is a long-term asset to your property. The goal is not to build the cheapest possible structure, but the most cost-effective one. This means evaluating every cost through the lens of longevity, functionality, and future value. A shed that needs replacing in five years because you used subpar materials is far more expensive than one that stands strong for twenty.
Start with a clear total budget in mind. Then, break it down into categories: foundation, framing, siding, roofing, doors, windows, and interior. Allow for a contingency fund of 10-15% for unexpected costs, they are a guarantee, not a possibility in the world of DIY. With this structured approach, you can make informed decisions that balance immediate costs with long-term benefits.
Where to Save: Smart Savings Without Sacrificing Integrity
Saving money on your shed doesn’t have to mean compromising its structural integrity or appearance. It’s about being resourceful, prioritizing function over form in certain areas, and avoiding unnecessary extras.
1] The Foundation: Gravel is Gold
For most small to medium-sized sheds, a full concrete slab is often overkill and is certainly a budget-buster when you factor in materials and potential equipment rental. A gravel foundation is a supremely cost-effective and DIY-friendly alternative. This Article Is a Gravel Shed Foundation a Good Idea? Goes into all the details you need to Know about gravel foundations.
Why Save Here? A properly constructed gravel pad provides excellent drainage, prevents wood rot by keeping the structure off the damp ground, and is relatively simple to install. You’ll save hundreds, if not thousands, of dollars compared to a concrete pour.
How to Do It Right: Excavate the area to a depth of about 5-6 inches. Use a sturdy, weed-blocking landscape fabric to prevent vegetation from growing through. Then, layer and compact crushed stone or gravel. For a more stable base, you can use concrete patio pavers or solid concrete blocks set into the gravel to serve as permanent piers for your shed’s floor joists.
2] Lumber for Framing: Opt for Standard Sizes and Smart Grades
The skeleton of your shed is critical, but that doesn’t mean you need the most premium lumber for every piece.
Why Save Here? Lumber costs can be volatile. By choosing standard, common dimensions (like 2x4s for walls) and avoiding specialty lengths or widths, you keep costs predictable.
How to Do It Right: Use standard #2 grade lumber for your wall studs, roof rafters, and floor joists. This grade is strong, reliable, and perfectly suited for structural applications. You can often find better deals at dedicated lumberyards compared to big-box home improvement stores. Also, consider using “economy” or “utility” grade boards for non-structural elements like internal bracing.
3] Roofing Materials: Asphalt Shingles are the Budget Champion
While a metal roof or cedar shakes are aesthetically pleasing, they come with a hefty price tag.
Why Save Here? Asphalt shingles are inexpensive, widely available, and remarkably durable for a shed application. A well-installed asphalt shingle roof can easily last 15-20 years, which is more than sufficient for an outbuilding.
How to Do It Right: Choose a simple, three-tab asphalt shingle in a color that complements your home. The installation is straightforward, making it an ideal DIY project. Ensure you use proper roofing felt underneath for an extra layer of weather protection. This is a prime example of where a standard, affordable product does the job perfectly well. Check out this Article Is a Metal Roof Cheaper Than Shingles? For more info on Metal Roofing.
4] Interior Finishes: Embrace the Utilitarian
Your shed’s interior doesn’t need the same finish level as your living room.
Why Save Here? Splurging on finished drywall or tongue-and-groove pine for the inside walls is an unnecessary expense for a space primarily used for storage or work.
How to Do It Right: Leave the studs exposed for ultimate utility, allowing for easy installation of shelves and hooks. If you want a finished look, the most budget-friendly option is oriented strand board (OSB) or low-grade plywood. You can always paint it white to brighten the space. For the floor, a simple coat of durable porch and floor paint on the plywood subfloor is sufficient and easy to touch up.

5] Doors and Windows: Think Repurposed and Simple
Brand-new, pre-hung doors and custom windows can quickly inflate your budget.
Why Save Here? Sheds are perfect candidates for salvage and repurposing.
How to Do It Right: Check online marketplaces, architectural salvage yards, and habitat for humanity ReStores for old windows and doors. An old window with character can become a charming focal point for a fraction of the cost. For doors, consider building a simple, sturdy slab door yourself from plywood and 1x4s. If you buy new, a basic, pre-hung shed door is a very affordable option. Avoid complex designs like Dutch doors unless they are essential to your shed’s function. Get more info on shed windows here. How to Choose the Best Shed Windows
Where to Splurge: Strategic Investments for Long-Term Value
Now for the fun part: where to allocate those extra dollars. Splurging in these key areas will pay dividends in the durability, security, and overall quality of your shed for decades to come.
1] The Floor: Don’t Skimp on the Platform You Build On
Your shed’s floor takes a tremendous amount of weight and abuse from tools, lawnmowers, and stored items.
Why Splurge Here? A weak floor will sag, bounce, and eventually fail, compromising the entire structure. This is the literal foundation of everything inside your shed.
How to Invest Wisely: Use pressure-treated lumber for all your floor joists and the sill plate that contacts the foundation. This is non-negotiable, as it prevents rot and insect damage. For the subfloor, opt for a thicker, sturdier plywood—at least 5/8-inch, but 3/4-inch tongue-and-groove is even better. This creates a solid, stable surface that won’t flex under heavy loads and provides a better base for any future flooring.
2] Siding: The First Line of Defense
Siding is your shed’s skin, protecting it from rain, wind, sun, and pests. Choosing a high-quality siding material is one of the best investments you can make.
Why Splurge Here? Cheap siding like low-grade T1-11 plywood can deteriorate quickly, leading to warping, rotting, and constant maintenance. Superior siding provides better insulation, enhances curb appeal, and drastically reduces long-term upkeep.
How to Invest Wisely: Consider durable options like vinyl siding, fiber-cement board (like HardiePanel), or high-quality engineered wood. These materials are designed to withstand the elements for decades with minimal maintenance. They may cost more upfront, but they will save you money on repairs, repainting, and premature replacement. This splurge directly protects all the other investments you’ve made in the structure. Need more info on shed siding? Check out this Article. Are Shed Siding Panels a Good Option?
3] Fasteners and Flashing: The Devil is in the Details
It’s tempting to buy the cheapest nails and screws and skip over pesky details like flashing. Don’t.

Why Splurge Here? Corroded fasteners can fail, and improper flashing is the primary cause of water damage around doors, windows, and the roof-to-wall junction.
How to Invest Wisely: Use hot-dipped galvanized or stainless-steel nails and screws, especially for exterior work. They will not rust and stain your siding. For flashing, don’t cut corners. Install durable, corrosion-resistant metal flashing (aluminum or galvanized steel) meticulously around every penetration and at all critical joints. A $30 roll of flashing can prevent thousands of dollars in rot repair. This is a small cost with an enormous protective payoff.
4] A Quality Door and Window (if buying new)
While we advocated for saving with repurposed items, if you are buying new, this is an area to consider upgrading.
Why Splurge Here? Doors and windows are common failure points for security and weather-tightness.
How to Invest Wisely: If security is a concern (for storing expensive tools, for example), invest in a solid-core door and a high-quality, weatherproof hasp that can accommodate a sturdy padlock. For windows, a double-paned, vinyl-framed window not only provides better insulation but is also more secure and durable than a flimsy, single-pane alternative. It will keep the elements out and your belongings safe. If your interested in building your own shed door, check this Article out. How to Build a Shed Door with Plywood
5] A High-Performance Roof Underlayment
Beneath your affordable asphalt shingles lies an opportunity for a smart upgrade.
Why Splurge Here? Standard roofing felt (tar paper) does an okay job, but it can be susceptible to tearing during installation and doesn’t offer the best long-term protection against wind-driven rain.
How to Invest Wisely: Splurge on a synthetic roof underlayment. This felt-like material is lighter, stronger, and much more resistant to tears. It provides a superior secondary water barrier and is often more slip-resistant, making your DIY installation safer. It’s a relatively small percentage of your total budget that significantly boosts your shed’s weather resistance.
Building a shed on a budget is a balancing act, a dance between fiscal responsibility and visionary investment. By saving strategically on the foundation with gravel, choosing standard lumber grades, opting for affordable asphalt roofing, and keeping the interior utilitarian, you free up crucial funds. You can then channel those resources into the components that truly matter: a robust and rot-resistant floor, durable and low-maintenance siding, corrosion-proof fasteners, and meticulous flashing.
This thoughtful approach to budgeting results in more than just a shed; it results in a lasting, valuable, and functional extension of your home. It’s a structure you will be proud of for years to come, not just because you built it yourself, but because you built it wisely. So, draft your plan, set your budget with these save-and-splurge principles in mind, and get ready to build a shed that is as smart as it is strong.

Questions and Answers
Question: “Where Should You Splurge When Building a DIY Shed?”
Answer: Splurge on the foundation, roofing, and doors/hardware. These components affect structural integrity and longevity, and replacing them later is far more expensive.
Question: “What Shed Materials Are Safe to Save Money On?”
Answer: You can save on siding choices, interior finishes, basic lumber (if graded correctly), and DIY shelving. These areas offer flexibility without risking quality.
Question: “Should You Buy Cheap or Premium Shed Roofing?”
Answer: Premium roofing (metal or high-grade shingles) is worth it. It prevents leaks, reduces long-term maintenance, and greatly increases your shed’s lifespan.
Question: “Is It Cheaper to Build a Shed from Scratch or Buy a Kit?”
Answer: Building from scratch is usually cheaper and more customizable if you source materials wisely. Shed kits cost more but save time and simplify the process for beginners.
Question: “Where Can You Save Money on Shed Windows?”
Answer: You can save by reducing the number of windows, choosing fixed over operable, or skipping them entirely if the shed is for storage only.
Question: “Should You Splurge on a Concrete Shed Foundation?”
Answer: Splurge if your shed will store heavy equipment or sit on uneven soil. A concrete slab offers unmatched durability and prevents future shifting and moisture issues.
Question: “How Can DIY Labor Help You Cut Shed Costs?”
Answer: Doing your own framing, roofing, painting, and interior work can cut your cost by 40–60%. Labor is often the most expensive part of a shed build.
Question: “Is Premium Shed Siding Worth the Extra Cost?”
Answer: Not always. Basic wood siding, T1-11, or treated plywood often perform well when painted or sealed properly. Premium siding is optional unless you want low-maintenance longevity.
Question: “Where Should You Splurge for Better Shed Security?”
Answer: Splurge on heavy-duty doors, quality locks, strong hinges, and reinforced framing around door openings. Cheap hardware fails quickly and makes theft easy.
Question: “What Shed Features Are Worth Saving On?”
Answer: Save on interior organization, decorative trim, budget paint (as long as it’s exterior-rated), and DIY-built shelving. These features can always be added or upgraded later.