
The dream is taking shape. You’ve spent countless hours on Pinterest and YouTube, marveling at the sleek lines, the industrial charm, and the sheer innovative potential of a shipping container home. It’s more than a dwelling; it’s a statement, a testament to sustainable, efficient, and modern living. You’ve found your perfect plot of land, and the vision is crystal clear.
But between that dream and your first night spent under a corrugated steel roof lies the most critical, and often most underestimated, phase of the entire project: site preparation.
Think of site prep as the foundation of your foundation. For a traditional home, it’s important. For a shipping container home, it’s absolutely paramount. These steel boxes are structurally unique. They are designed to be stacked high on container ships, bearing immense loads at their four corner castings, but their long, unsupported sides can be vulnerable if not properly supported from the get-go.
A rushed or improper site prep job can lead to a cascade of problems: foundation failure, water intrusion, doors and windows that won’t open, and costly, frustrating repairs.

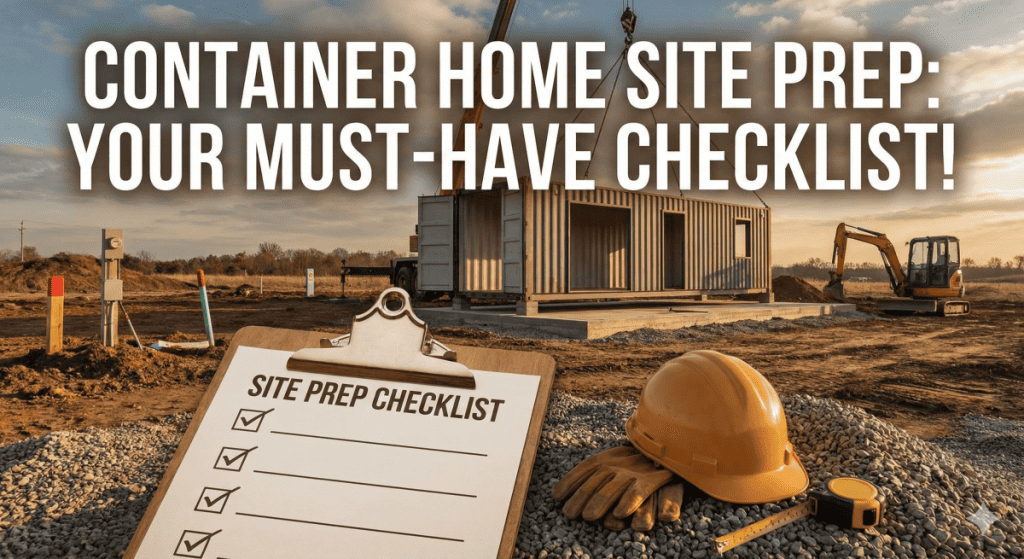
The Ultimate Site Prep Checklist for Your Shipping Container Home Build
Quick Navigation Menu
Phase 1: The Paperwork & Planning Foundation
Phase 2: The Physical Groundwork – Clearing and Earthmoving
Phase 3: The Invisible Infrastructure – Utilities and Foundation
Phase 4: Final Grading, Drainage, and Access
Phase 5: The Final Pre-Container Placement Check
What Are Key Factors When Choosing A Container Home Site?
How Do You Evaluate Soil For A Container Home?
Which Foundation Type Works Best For Container Homes?
How Do You Ensure Proper Drainage And Grading for a Container Home?
What Tools Are Needed For Container Home Site Preparation?
How Do You Plan Utility Hookups For a Container Home Site?
What Steps Are Needed for a Container Home To Clear And Level The Land?
This checklist is your roadmap. It’s designed to guide you, step-by-step, through the process of transforming a raw piece of land into a perfectly prepared stage, ready for your container home to take its place. Let’s dig in.
Phase 1: The Paperwork & Planning Foundation
Before a single blade of grass is cut or a soil sample is taken, your project lives on paper. Getting this phase right saves you from legal nightmares, budget blowouts, and redesigns down the line.
Due Diligence and Zoning: The Rule of the Land
Your first stop is your local government’s zoning and planning department. Do not assume you can build whatever you want, wherever you want. You need definitive answers to these questions:
– Is a shipping container home permitted? Some municipalities have specific regulations or even prohibitions against alternative building materials. You must get a clear, written “yes.”
– What are the setback requirements? These rules dictate how far your home must be from the front, rear, and side property lines. This will directly influence where you can place your home on the lot.
– Are there any height restrictions or covenants? Homeowners’ associations (HOAs) often have strict architectural guidelines. Even if the county allows it, the HOA might not.
– What is the required process for obtaining a building permit? Understand the list of required documents—site plans, engineered foundation drawings, septic plans, etc. The permit is your green light; never start construction without it.

Utility Hookup Investigation: The Lifelines
Simultaneously, you need to investigate your access to essential utilities. This will be a major factor in your site planning and budget.
Water: Is municipal water available at the street? If so, what is the cost to tap into it and run a line to your build site? If not, you’ll be drilling a well. Scout locations for a well that won’t interfere with your home’s placement or future septic field.
Wastewater: Is there a city sewer connection? If not, you will need a septic system. This requires a percolation (perc) test to determine the soil’s absorption rate, which dictates the size and type of system you can install. The results of the perc test can literally make or break your building site.
Electricity: How far is the nearest power pole? The cost to run a new line can be astronomical. Get a quote from the utility company early. The alternative is going off-grid with solar/wind, which requires planning for sun exposure and equipment placement.
Internet & Gas: Don’t forget these modern necessities. Check availability and installation requirements for broadband and natural gas or propane.
The Professional Dream Team
You are the project manager, but you need a skilled team. Now is the time to assemble them.
A Civil Engineer: For most projects, especially on sloped or challenging lots, a civil engineer is essential. They will analyze your site and create a detailed grading and drainage plan. This document is your bible for managing water flow and is often required for permits.
A Geotechnical Engineer: This specialist will perform soil boring tests to determine the soil’s composition and bearing capacity. Their report is non-negotiable for your structural engineer to design a safe and effective foundation.
A Structural Engineer: Perhaps the most critical hire for a container home. They will take the geotech report and design a foundation system specifically for the unique point-load characteristics of shipping containers. Do not skip this.
Phase 2: The Physical Groundwork – Clearing and Earthmoving
With your permits in hand and plans finalized, it’s time to physically transform the land.
Staking and Layout: Drawing on the Dirt
Your builder or site contractor will use the approved site plans to physically mark the boundaries of your property and the exact footprint of your home. This involves driving stakes and running string lines. Walk this layout. Stand in the corners of your future living room and kitchen. Does the orientation feel right? Does it capture the views you envisioned? This is your last chance to make minor adjustments before the heavy machinery arrives.

Clearing and Grubbing: A Clean Slate
This is the process of removing all vegetation, trees, stumps, and debris from the build area and the areas needed for access and utility trenches. It’s more than just mowing weeds.
Tree Removal: Have large trees professionally removed. If there are any trees you wish to preserve, clearly mark them with bright tape and communicate their importance to the operator.
Topsoil Preservation: This is a pro-tip. The top layer of soil is rich with organic matter. Have your operator carefully scrape and stockpile this topsoil in a corner of your lot. After construction is complete, you can spread it back over the disturbed areas for successful re-vegetation and landscaping.
Rough Grading: Shaping the Earth
Following the civil engineer’s grading plan, the operator will use bulldozers and excavators to cut away high spots and fill in low spots to create the general shape of your site. The primary goal here is to establish positive drainage. The land should slope away from your home’s footprint in all directions to prevent water from pooling around your foundation. A general rule is a minimum slope of 6 inches for the first 10 feet.
Phase 3: The Invisible Infrastructure – Utilities and Foundation
This is where the magic happens underground. A well-prepared site is a network of carefully installed systems you’ll (hopefully) never see again.
Trenching for Utilities: The Underground Nervous System
Before the foundation is poured, trenches need to be dug for the utility lines that will run under your foundation or come up through it.
Water and Sewer/Septic Lines: These need to be buried below the frost line to prevent freezing. Conduit for electrical and data lines may also be run in these trenches.
The Septic System Installation: If you’re on septic, this is a major undertaking. The tank and drain field will be installed according to the engineered plans. This area must be kept entirely free of construction traffic and heavy equipment after installation to avoid crushing the pipes.
The Foundation: The Bedrock of Your Build
This is the single most important element of your site prep. A shipping container’s strength is at its corners; its weakness is its long, flexible sides. Your foundation must address this.
Common Foundation Types for Container Homes:
Concrete Piers: This is a very popular and often cost-effective option. Concrete is poured into cylindrical holes (sonotubes) at precise locations to correspond with the corner castings of your containers. A steel rebar cage is often embedded into the wet concrete, with a bolt or plate at the top to connect to the container. This system is ideal for stable soil and minimal site disturbance.
Strip Footings: These are continuous concrete footers that run like ribbons under the load-bearing walls (the long sides) of the containers. This provides excellent, continuous support, preventing the middle of the container from sagging over time. They require more excavation and concrete but offer great peace of mind.
Slab-on-Grade: A monolithic concrete slab poured directly on the ground. For container homes, this often involves thickened edges (turned-down footings) where the containers will sit. This creates a fantastic, level floor surface and integrates well with radiant floor heating. It must be perfectly level and include all necessary anchor points welded to the rebar before the pour.

Key Steps for a Successful Foundation:
Excavation: The area for your piers, footers, or slab is dug to the exact dimensions and depth specified by your structural engineer.
Compaction: The soil at the bottom of the excavation is mechanically compacted to create a stable base. This prevents settling.
Formwork and Rebar: Wooden or metal forms are built to hold the wet concrete. The steel rebar cage is then placed inside the forms, according to the engineered drawings. This rebar gives the concrete its tensile strength.
The Pour: Concrete is delivered and poured into the forms. It must be vibrated to remove air pockets and then leveled (screeded) to perfection.
Curing and Anchor Bolts: Concrete doesn’t “dry”; it “cures,” a chemical process that takes about 28 days to reach full strength. During the pour, anchor bolts or plates are set into the wet concrete at the exact locations of the container’s corner castings. The precision of these anchor points is critical. Double-check, then triple-check their placement before the concrete sets.
Phase 4: Final Grading, Drainage, and Access
With the foundation cured and the underground utilities in place, you’re in the home stretch of site prep.
Final Grading and Drainage: The War on Water
Water is the enemy of any home, and a container home is no exception. Now that the heavy work is done, you return to the civil engineer’s plan for the final grading.
Swales and Berms: These are shallow ditches (swales) and mounds of earth (berms) designed to channel water away from your home and toward a safe discharge point, like a storm drain or a dry well.
French Drains: If you have areas with a high water table or persistent dampness, a French drain may be necessary. This is a perforated pipe buried in a trench filled with gravel, which collects and redirects groundwater.
Landscaping Fabric and Gravel: Around the perimeter of your foundation, it’s wise to lay down landscaping fabric and cover it with a bed of gravel. This creates a “capillary break,” preventing soil from splashing onto your containers and allowing water to drain away quickly.
Driveway and Access: Your Path Home
You need a way to get your containers to the site, and you need a permanent driveway for yourself.
Temporary Access for Delivery: The delivery truck carrying your 40-foot-long, 10-ton container needs a wide, firm, and level path right up to your foundation. Discuss this extensively with your transporter. They may need a crane if the truck cannot get close enough.
Permanent Driveway Installation: Once the container is placed, you can install your final driveway. Whether it’s asphalt, concrete, or gravel, ensure it has a solid, compacted base and proper drainage.

Phase 5: The Final Pre-Container Placement Check
The day has arrived. The truck is scheduled. Before it rumbles down your new driveway, perform this final, crucial walkthrough.
The Ultimate Pre-Placement Verification:
Anchor Bolt Verification: Are all the anchor bolts present, undamaged, and perfectly aligned with the container’s corner castings? Do you have the correct nuts, washers, and any other connection hardware?
Utility Stub-Ups: Are all the water, sewer, and electrical conduits stubbed up through the foundation or in their designated locations, ready for connection? Are they properly capped and protected?
Clearance and Safety: Is the path for the truck and/or crane completely clear of overhead wires, tree limbs, and other obstacles? Is the area around the foundation safe for the crew to work?
Foundation Surface: Is the top of the foundation clean and free of debris? A small piece of gravel can prevent a container from sitting perfectly level.
Conclusion: The Unshakable Base for an Extraordinary Home
Site preparation is not the glamorous part of building a shipping container home. It’s a process of dirt, dust, detailed plans, and significant investment. It’s the part of the iceberg that remains unseen. But its importance cannot be overstated. A meticulously prepared site is the difference between a home that endures for generations and a project plagued with foundational headaches.
By methodically working through this checklist—from the initial zoning research to the final bolt check—you are doing more than just preparing a piece of land. You are building the unshakable base upon which your vision will securely rest. You are ensuring that the sleek, modern, sustainable home of your dreams has the strong, resilient, and perfectly prepared foundation it deserves. Now, you’re ready for the main event. Get ready for delivery day.
What Are Key Factors When Choosing A Container Home Site?
Your first and most critical step is investigating zoning and building codes. Many areas have restrictions on alternative building methods. You must confirm that a shipping container home is expressly permitted, understand setback requirements, and be prepared to submit detailed, engineered plans for approval.
Next, scrutinize utility access. Determine the cost and feasibility of connecting to municipal water and sewer. If those aren’t available, a successful well drill and a favorable percolation test for a septic system are essential. Also, check the cost of bringing grid power to the site and the quality of cell and internet service.
The physical characteristics of the land are paramount. Consider topography; a sloped site can offer great views but requires a more complex foundation. Soil condition directly impacts your foundation choice and cost. Crucially, assess vehicle access—delivering 40-foot containers and maneuvering a large crane requires wide, stable roads and adequate space on the plot.
Finally, align the site with your vision and budget. An off-grid retreat has different needs than a suburban home. Always budget for hidden costs like land clearing, driveway installation, and extensive utility hookups, as these can surpass the land’s purchase price. The perfect site balances legality, practicality, and personal inspiration.
How Do You Evaluate Soil For A Container Home?
Evaluating the soil is a critical step when selecting a site for your shipping container home, as it directly determines the stability and cost of your foundation. The process begins with a professional geotechnical survey. This is a non-negotiable investment where experts drill boreholes to analyze soil composition, bearing capacity, and the depth of the water table.
Key factors they assess include the soil type. Stable, well-draining soils like sandy loam or gravel are ideal, providing a solid base with minimal movement. In contrast, expansive clay soils are a major concern. They swell when wet and shrink when dry, exerting significant pressure on foundations and leading to cracks and structural shifts over time. Furthermore, the soil’s load-bearing capacity must be sufficient to support the immense weight of stacked containers without settling.
Another crucial element is drainage. Poorly draining soil can lead to water pooling around the steel containers, accelerating corrosion and creating potential flooding issues. The geotechnical report will provide specific recommendations for the most suitable foundation type, whether it’s a simple concrete slab, deeper footings, or engineered piers to transfer the load past unstable soil down to stable bedrock.
While you can perform a simple percolation test for septic planning or observe water drainage after rain, these are no substitute for expert analysis. A thorough soil evaluation upfront prevents catastrophic foundation failures and ensures the long-term durability of your container home.
Which Foundation Type Works Best For Container Homes?
There is no single “best” foundation for a shipping container home; the ideal choice depends on your specific site conditions, budget, and design. The most common and effective types are pier, slab, and strip footings.
Pier foundations are often a top contender. They involve concrete piers set deep into the ground, either drilled or poured, which support the container at its corners. This system is highly adaptable to sloped or uneven terrain, minimizing site disturbance and excavation costs. It also excels in flood-prone areas by elevating the structure and allows for easy access underneath for utilities and inspections.
A concrete slab-on-grade is a popular, cost-effective choice for flat, stable sites. It provides a solid, level base and integrates the home’s floor with the foundation. For container homes, a “turned-down” or reinforced slab that thickens at the edges is crucial to handle the containers’ intense point loads at the corners. This method is permanent and works well with radiant floor heating.
For more unstable soils or colder climates, continuous strip footings can be a reliable solution. These concrete trenches run under the entire length of the container walls, distributing the weight over a larger area. This prevents differential settling, which is critical when stacking containers.
Ultimately, the decision must be guided by a professional geotechnical report and structural engineer. They will analyze your soil’s bearing capacity and drainage to recommend the safest, most durable, and most cost-effective foundation for your specific project, ensuring your container home rests on a solid and permanent base.
How Do You Ensure Proper Drainage And Grading for a Container Home?
Ensuring proper drainage and grading is critical for a container home, as standing water can lead to soil instability, foundation problems, and accelerated corrosion of the steel structure. The goal is to direct water away from the home efficiently.
This process begins with thoughtful site grading. The land surrounding the home should be sloped to create a gradual fall, known as positive grading, for at least the first ten feet in all directions. A minimum slope of 5% is a common recommendation to ensure water flows away from the foundation rather than pooling against it. This often involves bringing in and compacting fill dirt to achieve the correct grade.
Complementing the grading, a robust perimeter drainage system is essential. This typically involves installing a French drain—a perforated pipe buried in a trench filled with gravel—that encircles the foundation. This drain captures subsurface water and safely channels it away from the site, discharging it downhill or into a storm drain or dry well.
Additional measures are vital for a comprehensive approach. Installing gutters and downspouts on the container home is non-negotiable; they collect roof runoff and should extend several feet away from the foundation. Furthermore, placing a capillary break, like a plastic vapor barrier, and a layer of coarse gravel around the foundation base helps prevent moisture from wicking upwards. For homes on piers, using skirting to keep the area beneath dry is also a key part of the overall strategy. Proper drainage is an integrated system, not a single feature.
What Tools Are Needed For Container Home Site Preparation?
Site preparation for a shipping container home requires a range of tools and heavy machinery to ensure a stable, level, and properly serviced building pad. The specific tools depend on the site’s condition, but the process generally follows a logical sequence.
The initial phase involves clearing and grading. For this, you’ll need heavy equipment like a bulldozer to remove large obstructions, an excavator for digging and precise shaping, and a motor grader for creating a smooth, level surface and establishing the crucial slope for drainage. A compact roller or plate compactor is then essential to mechanically tamp the soil, creating a solid, stable base that prevents future settling.
For the layout and foundation work, surveying tools are indispensable. A builder’s level or laser level ensures accurate placement of the foundation and verifies that the pad is perfectly level. This is critical for the containers to sit correctly and stack properly. Basic tools like measuring tapes, string lines, and stakes are used to mark the exact footprint and outline for foundations, whether it’s for concrete piers, a slab, or footings.
Finally, utility installation requires trenching tools. A backhoe or a dedicated trencher is used to dig ditches for water, sewer, electrical, and internet lines. Hand tools like shovels and picks are still necessary for finer work around connections. Ultimately, while some tasks can be done manually, professional-grade machinery is key to achieving the precision and compaction needed for a successful container home project.
How Do You Plan Utility Hookups For a Container Home Site?
Planning utility hookups for a container home site requires early and meticulous strategy, as the modular nature of the structure presents unique challenges. The process begins with a thorough site assessment to determine the proximity and cost of connecting to municipal services.
For water and sewer, you must first establish the source. If public lines are available, contact the local utility for connection protocols and costs. If not, a successful well drill and a favorable percolation test for a septic system are mandatory. The septic drain field location must be integrated into your site plan from the start.
Electrical planning involves getting a quote from the power company to run service from the nearest pole to your home’s main panel. Given the energy efficiency challenges of steel homes, this is also the time to plan for solar power, ensuring the electrical design can accommodate a grid-tied or off-grid system.
A critical step is designing how utilities enter the structure. Unlike traditional homes, you cannot easily drill through the structural integrity of a container’s corrugated walls after placement. All entry points for water lines, sewer pipes, and electrical conduits must be pre-planned and precisely cut before the containers are set on the foundation, often through the floor or a non-structural wall section. Consulting with engineers and utility providers during the design phase is essential to create a coherent and efficient plan.
What Steps Are Needed for a Container Home To Clear And Level The Land?
Clearing and leveling land for a container home is a systematic process crucial for foundation integrity and drainage. It begins with a thorough site assessment and staking. Clearly mark the property boundaries and the exact footprint of your planned home. This defines your work area and prevents unnecessary clearing.
The next step is clearing and grubbing. This involves removing all vegetation, trees, stumps, rocks, and debris from the marked area. Using heavy machinery like a bulldozer or excavator is typical for efficiency. It is vital to remove all organic material, as leaving it to decompose under the foundation would lead to settling and instability.
Once clear, the rough grading phase begins. The goal is to shape the land to the desired contour, creating a building pad that is not just level but also slopes slightly away from the home’s center for future drainage. An excavator and motor grader are used to cut away high spots and fill in low spots, using the excavated soil.
The final and most critical step is compaction. After rough grading, the soil must be mechanically compacted in layers, or lifts, using a plate compactor or a sheepsfoot roller. This eliminates air pockets and creates a dense, stable base that can bear the immense weight of the containers without settling. A professional should then verify the pad is level and properly compacted before any foundation work begins, ensuring a solid start for your build.